
There’s a reason chefs treat stock as the foundation of good cooking. A well-made pot of homemade stock turns an ordinary soup into something deeply satisfying, with a richness that store-bought versions simply can’t match. If you’ve ever wondered how to make soup stock that tastes layered and full-bodied instead of watery, the answer comes down to a handful of simple techniques anyone can learn.
In this guide, you’ll learn what stock actually is, how it differs from broth, which ingredients matter most, and a clear step-by-step process for making homemade soup stock from scratch. By the end, you’ll have everything you need to build a freezer stash of flavorful stock you can rely on all year.
What Is Soup Stock?
Stock is a savory liquid made by simmering bones, vegetables, and aromatics in water over a long period. As the ingredients cook, they release collagen, minerals, and flavor compounds into the water, creating a base that’s far more flavorful than water alone.
Cooks use stock as the starting point for soups, stews, risottos, sauces, and braises because it adds depth without needing extra seasoning. Homemade stock tends to taste better than packaged versions because you control the ingredients, the cooking time, and the concentration of flavor. There’s also no hidden sodium or preservatives working against the dish you’re trying to build.
Stock vs. Broth: What’s the Difference?
People often use these terms interchangeably, but there’s an important distinction between stock and broth that affects how each one behaves in a recipe.
| Feature | Stock | Broth |
|---|---|---|
| Main ingredient | Bones (with some meat) | Meat, sometimes with bones |
| Cook time | Long (4–24 hours) | Shorter (1–2 hours) |
| Texture | Thicker, gelatinous when chilled | Thinner, more liquid |
| Flavor | Deep, rounded, neutral seasoning | Lighter, often pre-seasoned |
| Best uses | Sauces, soups, risotto, braises | Sipping, light soups |
Stock’s long simmer time pulls collagen out of bones, which is what gives cooled stock its jelly-like texture. That collagen adds body to whatever you cook with it, which is part of why a soup stock recipe built around bones produces a noticeably richer result than one made only with meat.
Ingredients You’ll Need
Good stock doesn’t require anything fancy, just a handful of ingredients used the right way.
Bones form the backbone of the recipe. Chicken backs, wings, and carcasses work well for chicken soup stock, while beef knuckle or marrow bones suit a heartier version. Roasted or raw bones both work, though roasting adds color and depth.
Vegetables like onion, carrot, and celery (the classic mirepoix) add sweetness and balance. For a vegetable soup stock, you can lean on mushrooms, leeks, and fennel for extra savoriness.
Herbs and aromatics, such as bay leaves, parsley stems, peppercorns, and garlic, round out the flavor without overpowering it.
Water should always be cold at the start. Cold water helps draw out flavor and impurities gradually, rather than sealing them in.
Vinegar is optional but useful when making bone-heavy stock. A splash of apple cider vinegar helps break down collagen and pull more minerals out of the bones during simmering.
How to Make Soup Stock (Step-by-Step)
This is the part that matters most, so let’s walk through it carefully. Each step plays a specific role in building flavor and texture.
Step 1: Prepare your ingredients. Roughly chop your vegetables (no need to peel onions or carrots, since the skins add color). Rinse your bones under cold water to remove any surface debris.
Step 2: Roast the bones (optional). For a deeper, more savory homemade stock, roast bones at 425°F for 30–40 minutes until browned. This step isn’t required, but it adds a noticeably richer flavor, especially for beef or pork stock.
Step 3: Add cold water. Place the bones in a large pot and cover with cold water. Starting cold, rather than pouring in hot water, allows proteins to release slowly instead of clouding the stock.
Step 4: Simmer gently, never boil. Bring the pot to a bare simmer, where you see small, occasional bubbles rather than a rolling boil. A hard boil emulsifies fat into the liquid, making your stock greasy and cloudy instead of clear.
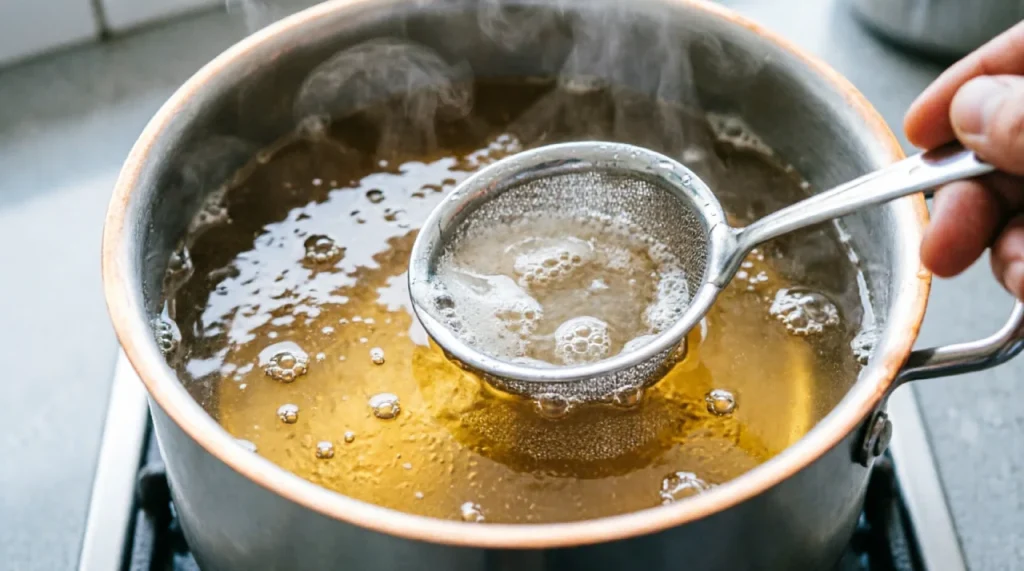
Step 5: Skim impurities. During the first hour, foam and gray scum will rise to the surface. Skim this off with a spoon or fine mesh skimmer. This step is what keeps your stock clean-tasting rather than bitter.
Step 6: Add vegetables and aromatics. Add your mirepoix, herbs, and peppercorns partway through cooking, usually in the last 1–2 hours for long-simmered stocks. Adding them too early can make the vegetables turn mushy and dull the flavor.
Step 7: Strain thoroughly. Once the stock has simmered long enough (4–6 hours for chicken, 8–24 hours for beef, 45 minutes to an hour for vegetable stock), strain it through a fine mesh sieve or cheesecloth to remove solids.
Step 8: Cool safely. Cool the stock quickly by placing the pot in an ice bath before refrigerating. Letting a large pot of warm liquid cool slowly on the counter creates food safety risks, so speeding up this step matters.
Chef’s Tip: Don’t throw out the fat that rises to the top once your stock is chilled. Skim it off and save it for sautéing vegetables or roasting potatoes; it carries a surprising amount of flavor.
Beginner Tip: Don’t worry about peeling or perfectly chopping your vegetables. Since everything gets strained out at the end, rough chopping is completely fine.
Common Mistakes to Avoid
Even simple recipes go wrong in predictable ways. Here are the most common stock mistakes and how to fix them.
| Mistake | Why It’s a Problem | Fix |
|---|---|---|
| Boiling instead of simmering | Makes stock cloudy and greasy | Keep heat low, watch for gentle bubbles |
| Adding salt early | Stock reduces as it cooks, concentrating salt | Season the final dish, not the stock |
| Using too much water | Dilutes flavor | Use just enough water to cover bones |
| Wrong vegetables | Bitter greens or starchy veggies cloud flavor | Stick to onion, carrot, celery, herbs |
| Skipping the skim | Leads to murky, off-tasting stock | Skim foam regularly in the first hour |
| Poor storage | Stock spoils or loses flavor | Cool quickly, store properly (see below) |
How to Store Homemade Soup Stock
Once your stock is strained and cooled, proper storage keeps it safe and flavorful for future use.
In the refrigerator, homemade stock keeps well for about 4–5 days in a sealed container. In the freezer, it stays good for up to 4–6 months, especially if stored in airtight containers or freezer bags with the air pressed out.
Freezer: Stock freezes beautifully for up to 6 months. Use freezer-safe containers or bags, and leave a little room at the top since liquids expand as they freeze.
Ice cube trays are a great option for portioning small amounts, perfect for sauces or quick pan deglazing. Once frozen, transfer the cubes to a labeled freezer bag.
When reheating, bring stock to a full boil if it’s been stored for several days, which helps ensure it’s safe to use. Reheat only the amount you need rather than repeatedly thawing and refreezing the whole batch.
Frequently Asked Questions
Can I freeze soup stock? Yes. Stock freezes well for 4–6 months when stored in airtight containers or bags with excess air removed.
Can I reuse bones for a second batch? You can make a lighter “second stock” by simmering used bones again, though the flavor will be noticeably weaker than the first batch.
Why is my stock cloudy? Cloudiness usually comes from boiling too vigorously or skipping the skimming step, both of which let fat and proteins emulsify into the liquid.
Can I make vegetable stock instead of bone-based stock? Absolutely. Vegetable soup stock uses the same simmering principle but cooks much faster, typically 45 minutes to an hour, since there’s no collagen to extract.
How long does homemade stock last? About 4–5 days refrigerated, or several months frozen, depending on storage method and container quality.
Conclusion
Learning how to make soup stock is one of the most useful skills you can build in the kitchen, and it’s far simpler than it might seem. With quality bones or vegetables, a gentle simmer, and a little patience, you’ll end up with a homemade stock recipe that elevates everything from weeknight soups to special-occasion sauces. Once you taste the difference, it’s hard to go back to anything from a carton.