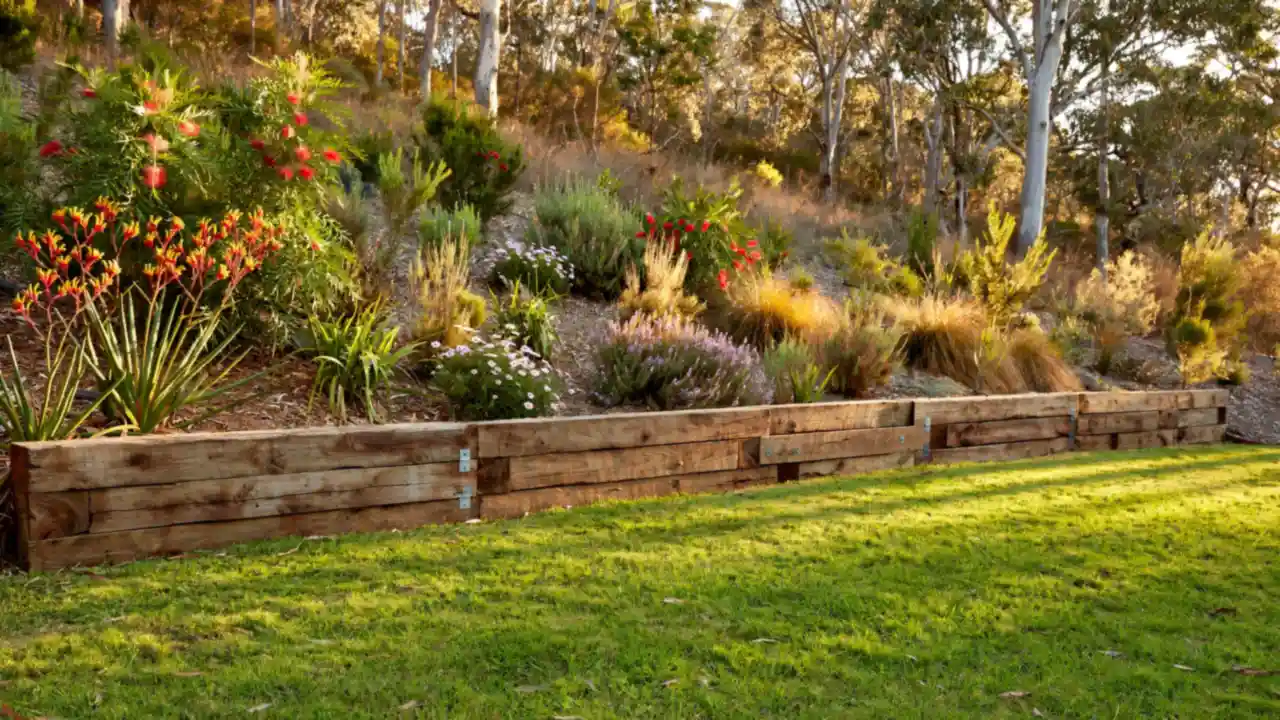
A sloping backyard can feel like wasted space. Every heavy rain washes soil down the slope, the lawn edge crumbles, and the garden beds you planted keep sliding downhill. This guide shows you how to build a timber retaining wall with treated pine sleepers, one low wall at a time, using the method in Bunnings’ own DIY guide and the engineering detail in Timber Queensland’s low-wall data sheets.
It covers the council rules, the timber grades, the post footings and the drainage that stops a wall from leaning. It stays with low walls only, up to one metre high. Anything taller, closer than 1.5 metres to a building, or carrying a driveway or pool needs an engineer, and this guide says so rather than teaching it.
Approvals, services and the 1-metre line
There is no single national rule for retaining walls, so the first job is a phone call, not a shovel. Check your council before you buy anything, because the height that triggers approval changes from state to state and even from council to council.
The common threshold is one metre. Queensland and Victoria both generally allow walls up to one metre high without building approval, and hipages puts the engineer line at the same height, although it can be as low as 600 mm in some parts of Australia. In Victoria, a permit is generally needed for walls over 0.6 m on or near a boundary, and a boundary build may need council permission at any height.
Queensland adds two more triggers. A wall needs building approval if it sits within 1.5 metres of a building or another retaining wall, or if it carries a surcharge load such as a driveway, a pool or a building. In Queensland an engineer provides a Form 15 for the design and a Form 16 certifying the work after inspecting the footings and other stages.
Call an engineer instead of building when the wall is over one metre high, within 1.5 metres of a building or another wall, or carrying a surcharge load. The same applies on sloping backfill, reactive soils, steep slopes, or where footings would bridge over services such as stormwater, sewer or electrical trenches. Most states in Australia require retaining wall builders to be licensed, so check whether your job needs a licensed builder or landscaper.
Before you dig any post hole, lodge a free enquiry with Before You Dig Australia to locate underground services. Search-snippet sources list 1100 as the phone number, and the service is a free national referral. Plans are indicative only, so confirm service locations physically before any mechanical excavation, and in New South Wales, snippet-sourced guidance says electricity-cable plans must be no more than 30 days old when excavation starts.
What you need
Treated pine is the cheapest way into a low retaining wall, and the timber grade is the decision that decides how long the wall lasts. Buy the right grade first, because a wall built from the wrong timber rots from the ground up.
Sleepers and timber grades
Choose timber with a minimum rating of H4 for anything that goes in the ground. H4 covers ground contact and freshwater use, while H5 is the grade for structural walls where failure is critical. H3 is above ground only, for decking and pergolas, and it rots quickly in ground contact.
- H4, the minimum for in-ground sleepers and posts
- H5, structural and critical walls, including engineered walls
- H3, above ground only, never in the ground
- Size, 200 by 75 mm treated pine is the usual pick for small residential walls, and 75 mm sleepers hold their shape better than 50 mm
- Stress grade, F7 minimum for softwood and F14 for hardwood, per Timber Queensland
There is no Australian Standard grading requirement for landscaping timber, so the quality of sawn sleepers varies greatly between suppliers. Structurally graded timber will generally be higher quality than ungraded landscaping timber.
Hardwood and second-hand timber
Durability class 1 or 2 hardwood is the alternative to treated pine. Timber Queensland names ironbark, grey gum, tallowwood, forest red gum and bloodwood as naturally durable species, expected to last more than 25 years provided sapwood is removed or H5-treated. Hardwood sleepers are usually 200 by 50 mm.
- Second-hand railway sleepers, avoid unless you know how they were treated, since many are creosote-treated
- Creosote and sump oil, never use either on the wall, and never near vegetable gardens or where children play
- Treatment types, CCA, ACQ and copper azole or MicroPro, per AS 1604.1
CCA treated pine should not be used where you may have frequent contact with the timber, where treatment may leach out, or near vegetable gardens. Use ACQ or MicroPro treated timber in those spots instead.
Posts, fixings and concrete
Posts carry the whole wall, so they get the same care as the sleepers. Treated pine sleeper posts are the usual choice, with galvanised steel H-beams or round posts as alternatives. Sleeper posts cost about a third of H beams, while H beams last longer but stay visible.
- Screws, 150 mm bugle screws, 14 gauge, through sleepers into posts
- Bolts, hot-dipped galvanised batten screws, coach screws or bolts, per TDS 8
- Double posts, galvanised M12 bolts at 400 mm centres for the full height, where TDS 9 calls for them
- Concrete, standard 15 MPa (N15) backfill for treated softwood posts, and no-fines concrete for hardwood posts, 10 mm maximum aggregate and 450 kg of cement per cubic metre, to AS 1379
- Lengths, sleeper lengths over 2.4 m are uncommon, and treated pine posts over 250 mm diameter may be hard to obtain
Cut ends of treated timber must be brushed with preservative, and post tops should be cut with a slight slope to shed water and sealed with a preservative emulsion. Never burn treated offcuts or sawdust, and dispose of them by approved local authority methods.
Tools and safety gear
Most of the kit is ordinary garden and carpentry gear. The safety gear matters more than usual here, because cutting treated timber makes dust that needs a mask.
- Marking, string line, stakes, spray paint and a tape measure
- Cutting, circular saw or handsaw, plus a pencil and square
- Digging, shovel or post-hole digger
- Fixing, drill with a No 2 screw tip and a spirit level
- PPE, safety glasses, gloves, ear muffs and a mask or respirator when cutting or staining treated sleepers
The build, step by step
Bunnings’ 15-step guide is the spine of this build, for a wall two sleepers high. The engineering detail comes from Timber Queensland’s low-wall data sheet, TDS 8, and the practitioner tips come from constructor.net.au and Inspiring Landscapes.
1. Plan the length and height
Decide the length and height of the wall before you buy a single sleeper. The Bunnings guide builds a wall two sleepers high, about 400 mm, and this guide stays inside that low-wall scope.
- At a glance, height of two sleepers, about 400 mm, for the Bunnings method
- Scope, low residential walls only, up to one metre high
- Over one metre, engineer territory, not a DIY build
2. Work out the soil, shape and timber
Ask how high the wall will be, what soil you are holding back, whether it curves or has corners, and what timber you will use. Clay, sand and rock all behave differently behind a wall, and corners need extra thought. This is also the point to decide between treated pine and hardwood.
- Ask first, soil type, clay, sand or rock, and whether it is reactive
- Shape, straight runs are simplest, corners and curves add work
- Timber, treated pine or durability class 1 or 2 hardwood
3. Check council approval first
Check the council rules before buying anything, because approval thresholds vary by state and council. The common line is one metre, with lower limits in some places and on boundaries.
- The rule, common threshold of one metre high, in Queensland and Victoria
- Lower limits, as low as 600 mm in some parts of Australia
- Boundary, a permit is generally needed over 0.6 m on or near a boundary in Victoria
- Check your council, the only instruction that holds everywhere
4. Lodge a Before You Dig enquiry
Lodge a free enquiry with Before You Dig Australia before you dig any post hole. The service locates underground services so a post hole does not hit a cable or pipe.
- Do this first, enquiry is free, through Before You Dig Australia
- Phone, 1100, per search-snippet sources
- Timing, allow up to two working days for all plans, per snippet sources
- Plans, indicative only, so confirm locations physically before mechanical excavation
5. Measure and mark out the wall line
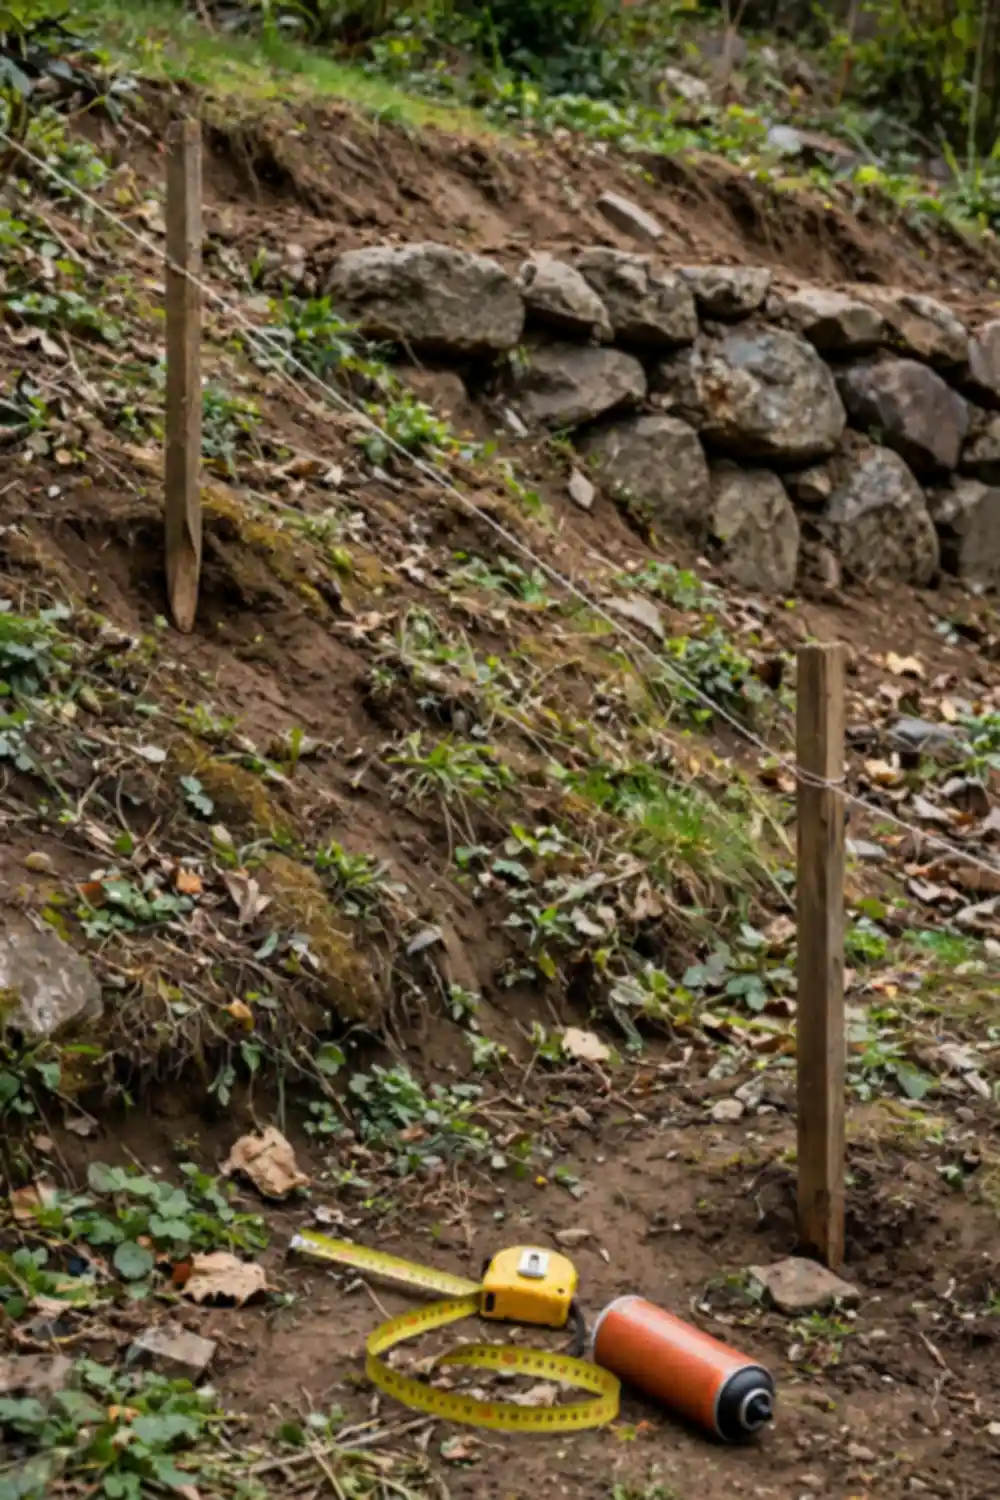
Tape-measure the length and work out how much timber you need. Leave space at the back of the wall for a drainage pipe, and mark the post positions. Excavate the soil back 500 mm behind the front of the wall line, as Inspiring Landscapes recommends.
- Marking kit, tape measure for length and timber quantities
- Space, leave room behind the wall for the drainage pipe
- Cut back, 500 mm of soil behind the front of the wall line
6. Run a string line
Run a string line between two stakes, set to the back of the wall, to keep the posts in line. Mark the line square with the house or pool using stringline, tape and spray paint.
- Line check, two stakes with a string line between them
- Position, set the line to the back of the wall
- Square, mark out square with the house or pool
7. Choose your timber
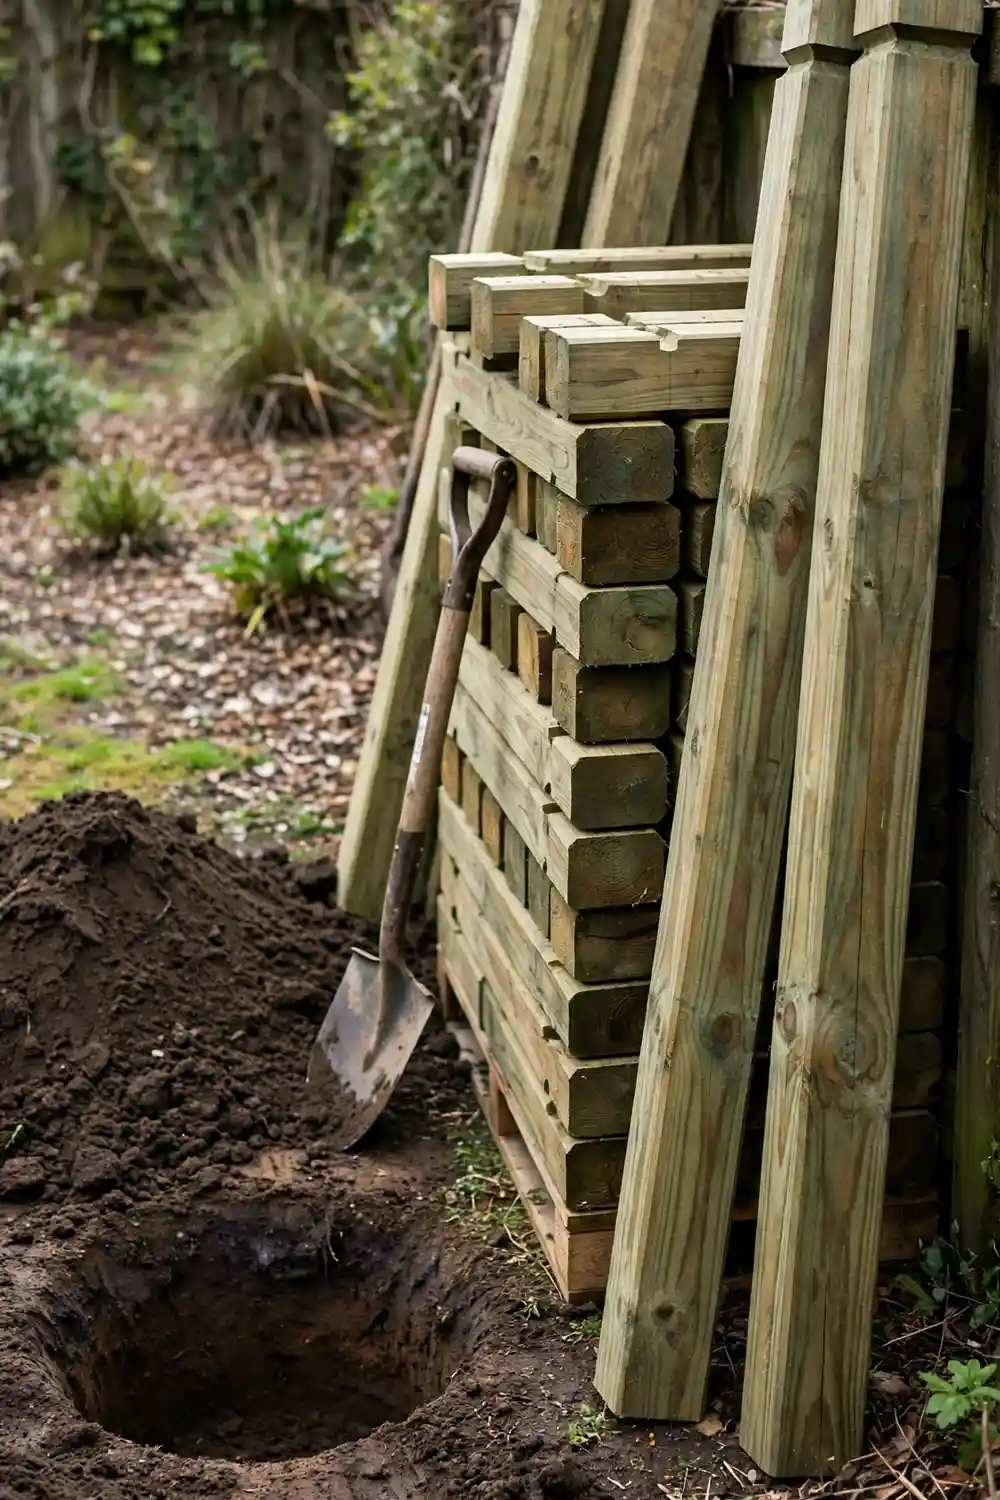
Choose timber with a minimum rating of H4, in treated pine sleepers designed to go in the ground. H5 is the grade for structural walls, and H3 never goes in the ground.
- Grade check, minimum of H4 or better for in-ground use
- Structural, H5 where failure is critical
- Avoid, H3 in ground contact, and second-hand sleepers of unknown treatment
8. Excavate and dig the post holes
Dig holes for the posts, and excavate 150 to 200 mm deeper than the first course of timber to allow for drainage material. Level and compact the base, then lay a 150 mm layer of free-draining material such as gravel or road base. If you are retaining a cut, excavate 400 mm behind the post centreline and batter the cut at 1 to 1.
- Hole spec, Bunnings rule of hole depth the same as the height above ground
- One-third rule, bury about a third of the post, per constructor.net.au and Inspiring Landscapes
- Gravel, 100 mm of drainage gravel in the base of each hole
- Hole size, 300 mm diameter for posts up to 150 mm, 450 mm for larger members
- Batter, 1 in 10 lean back into the bank for walls over 400 mm high, with holes bored about 6 degrees from vertical
9. Cut the posts to length
Measure from the bottom of the hole to the string line, and cut the posts with a circular saw or handsaw. Mark the cut with a pencil and square first.
- Cutting, measure from the bottom of the hole to the string line
- Mark, pencil and square before the saw
- Seal, brush preservative on every cut end
10. Set and concrete the posts
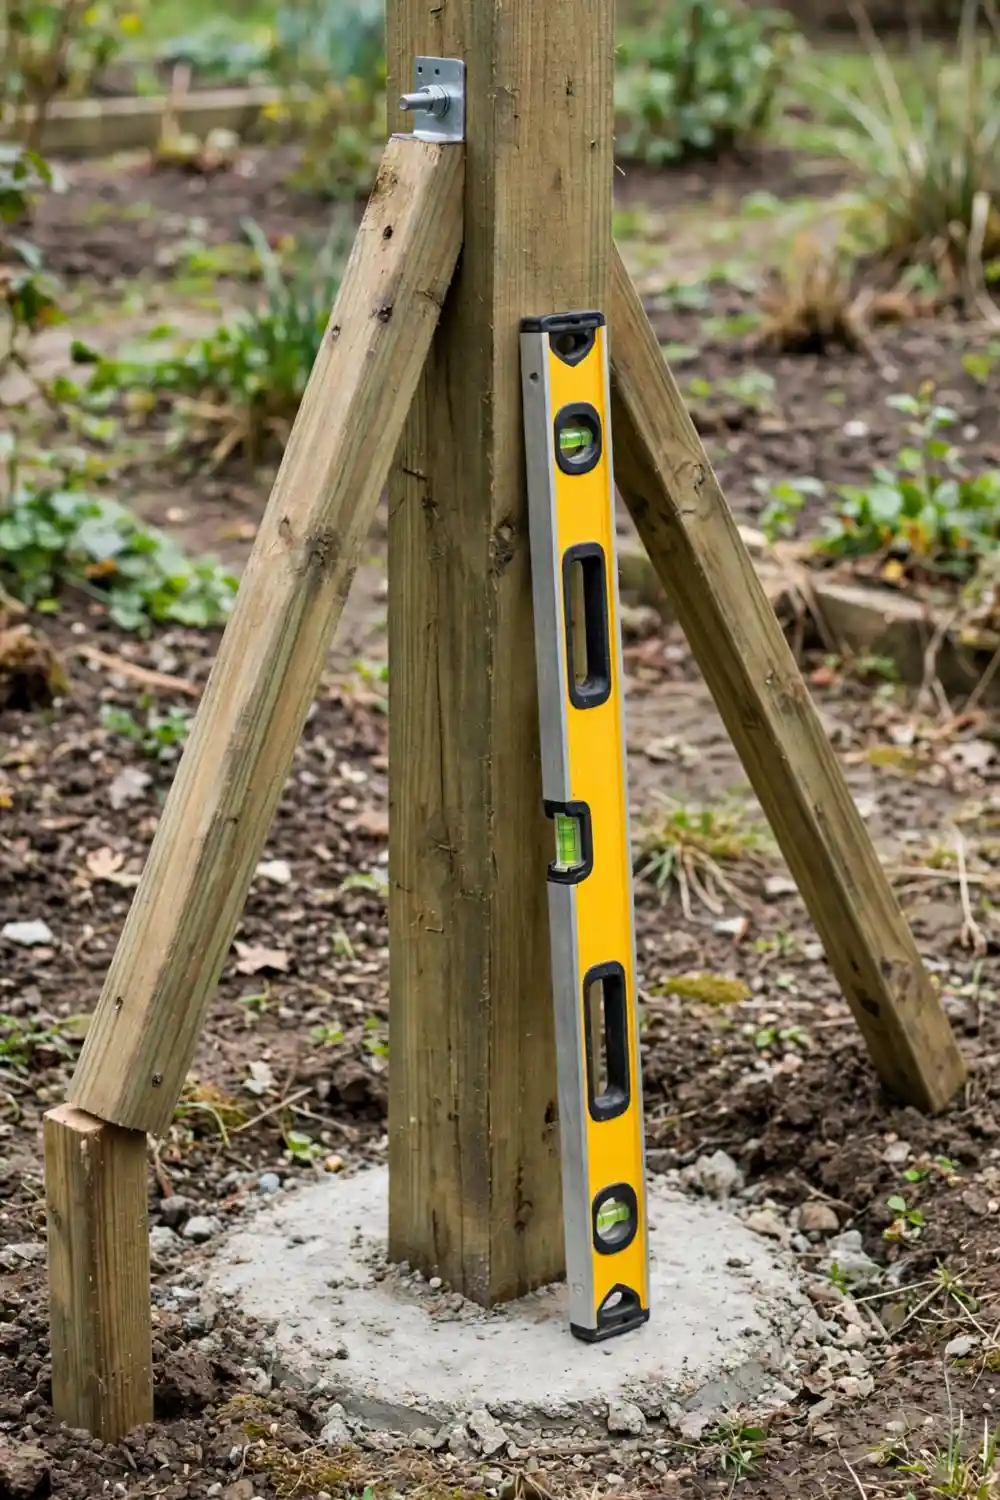
Set the posts plumb and braced, then pour concrete around the base and cover with soil. Allow at least 24 hours for the posts to set, and do not backfill sooner than three days after concreting, per TDS 8.
- Setting, brace the posts plumb before the concrete goes in
- Concrete, mix per the bag directions and pour around the base
- Bags, about three 20 kg bags of concrete per post, per Bunnings Workshop community advice
- Top, the last 100 mm topped with clay to prevent surface infiltration
- Wait, at least 24 hours to set, and three days before backfilling
11. Fix the sleepers, bottom row first
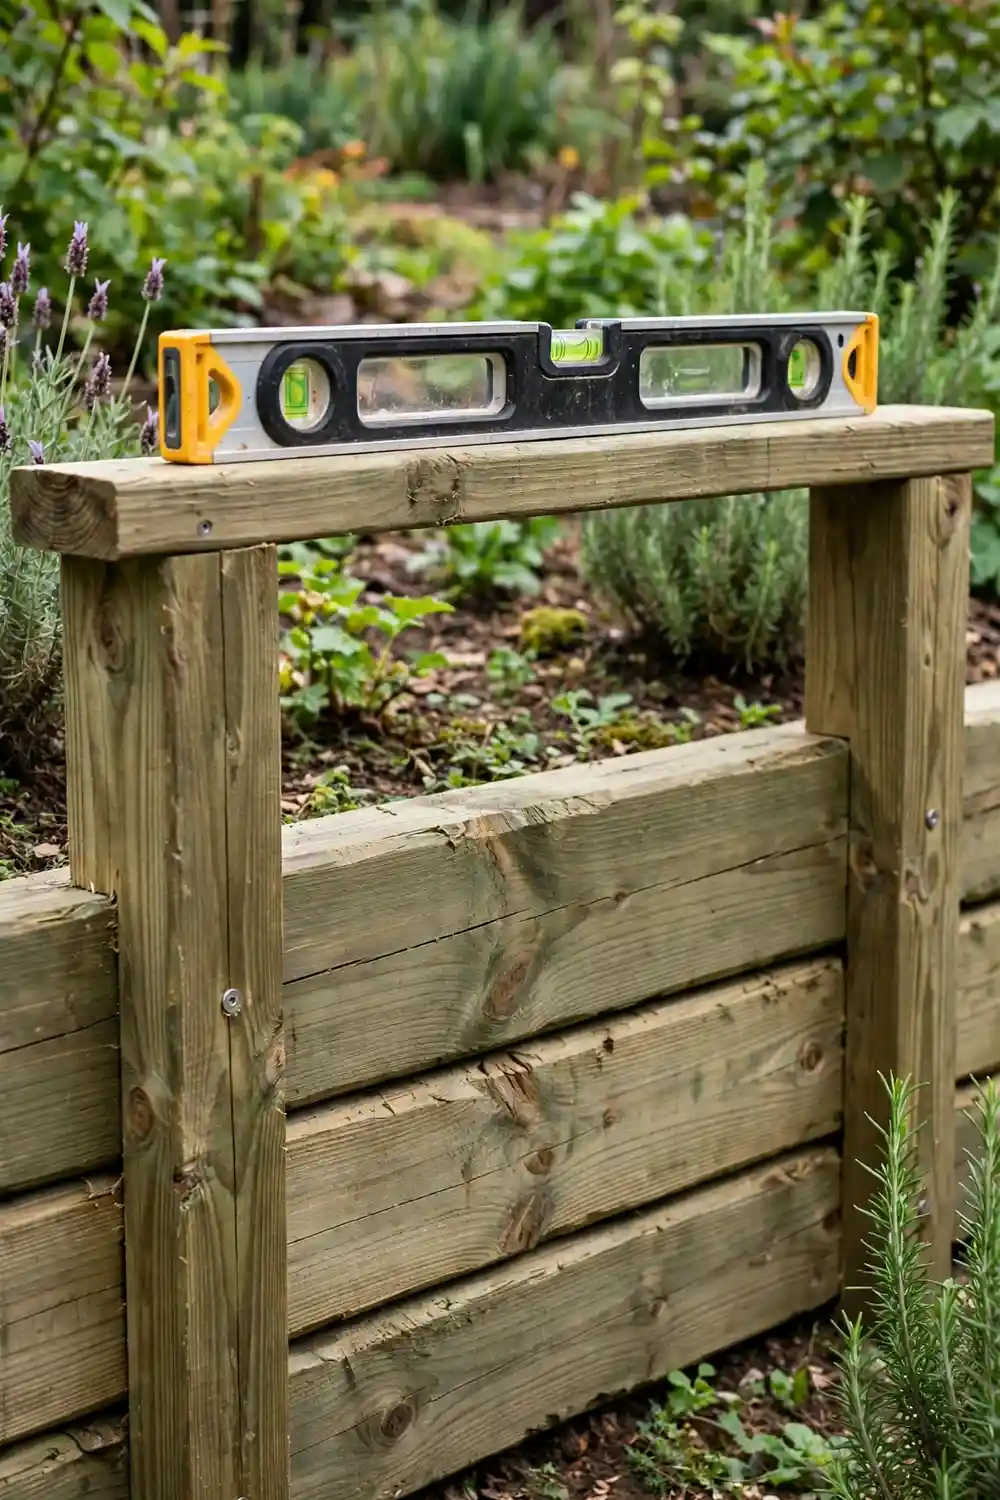
Place a wall sleeper behind the first end post and attach it with a drill, then repeat along the bottom row before stacking upward. Screw the entire bottom row first and level it with a spirit level, since every row above follows it. Walls above 400 mm high have the sleepers behind the posts, while walls up to 400 mm high may have concealed posts.
- Fixing, 150 mm bugle screws, 14 gauge, through sleepers into posts
- Order, bottom row first, levelled, then stack upward
- Check, spirit level on the first row before the next goes on
12. Trim and seal the post tops
Mark the height flush with the wall and cut the post tops off. Cut the tops with a slight slope so water sheds off, and seal them with a preservative emulsion.
- Finishing the tops, trim flush with the top of the wall
- Slope, slight slope to shed water
- Seal, preservative emulsion on the cut
13. Lay the drainage
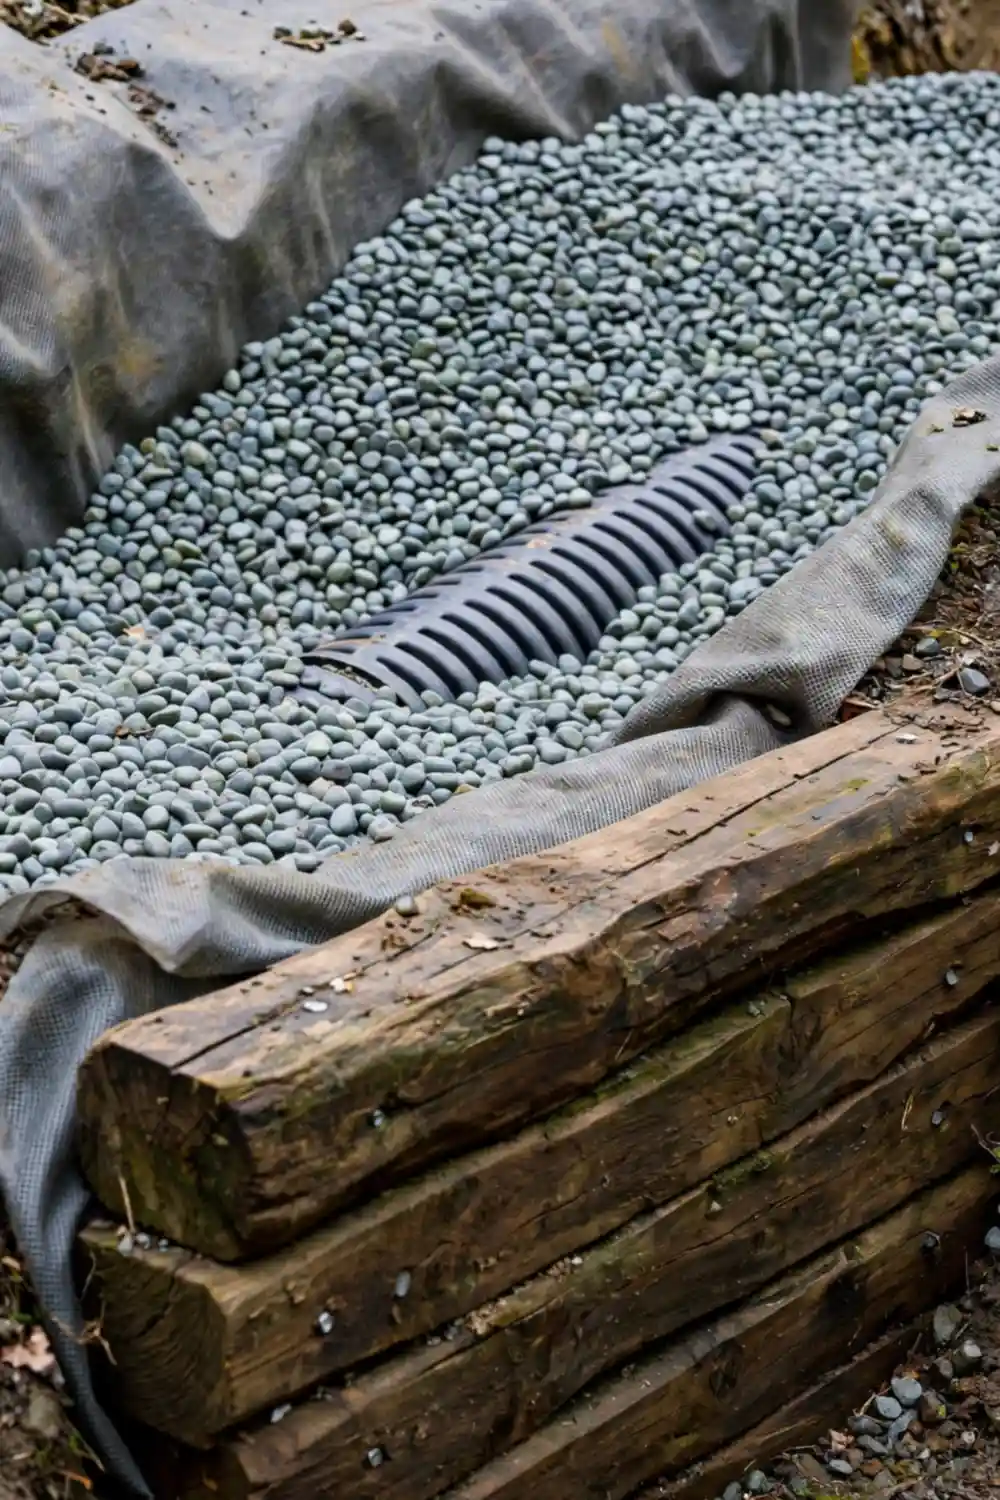
Pour a layer of scoria behind the wall and place the drainage pipe directly on top, then cover the pipe with another layer of scoria and then soil. Run the end of the pipe to a spot where it can be accessed, and direct it to a suitable stormwater drain on site or into a garden area. Drainage is the part that makes or breaks a retaining wall, because water building up behind it adds load and can push it over.
- Drainage spec, slotted polyethylene pipe at the base of the wall, discharging to a suitable outlet
- Cover, 20 mm aggregate or scoria around the pipe, to at least half the height of the wall
- Geotextile, placed to the inside face of the wall to stop backfill fines passing through gaps
- Outlet, stormwater drain or garden area, somewhere the water can go
14. Backfill and compact in layers
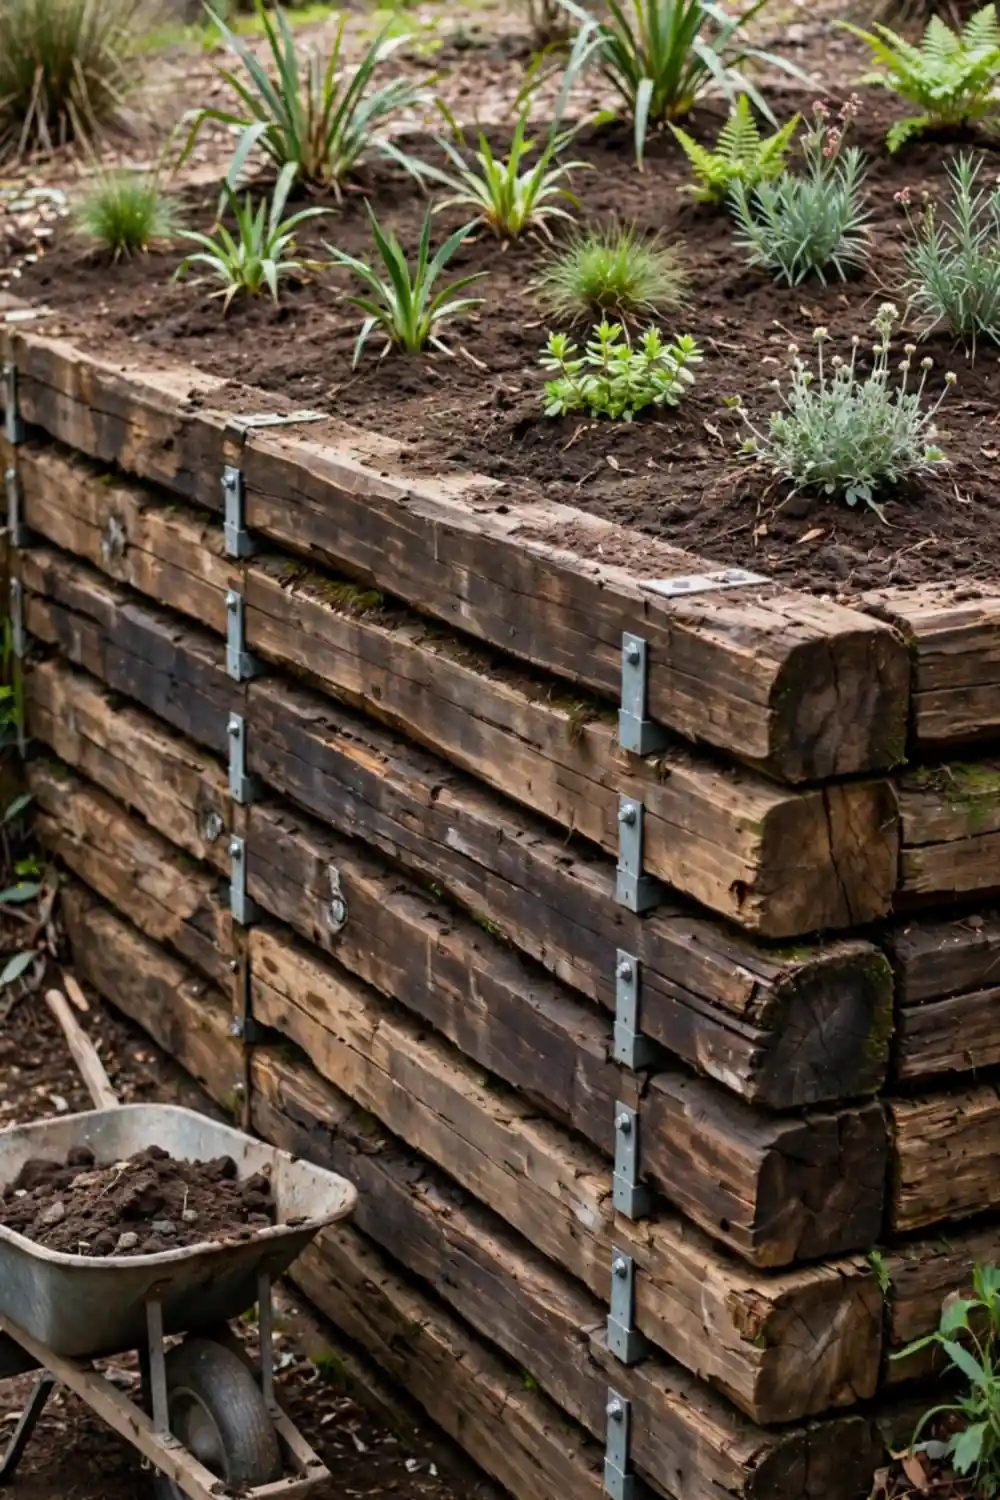
Backfill behind the wall with free-draining granular fill, compacting in layers and checking the wall stays plumb as you go. Never backfill with clay, because clay swells when it wets up and the swelling pressure leans the wall forward over time. Leave about 150 mm between the final backfill level and the top of the wall for settlement, and top up six months after installation.
- Backfill rules, free-draining granular fill only, gravel, sand or sandy gravel
- Never, clay, the worst backfill for a retaining wall
- Compact, in layers, checking the wall stays plumb
- Top, the top 150 to 200 mm may be garden soil
15. Cap it off and keep it maintained
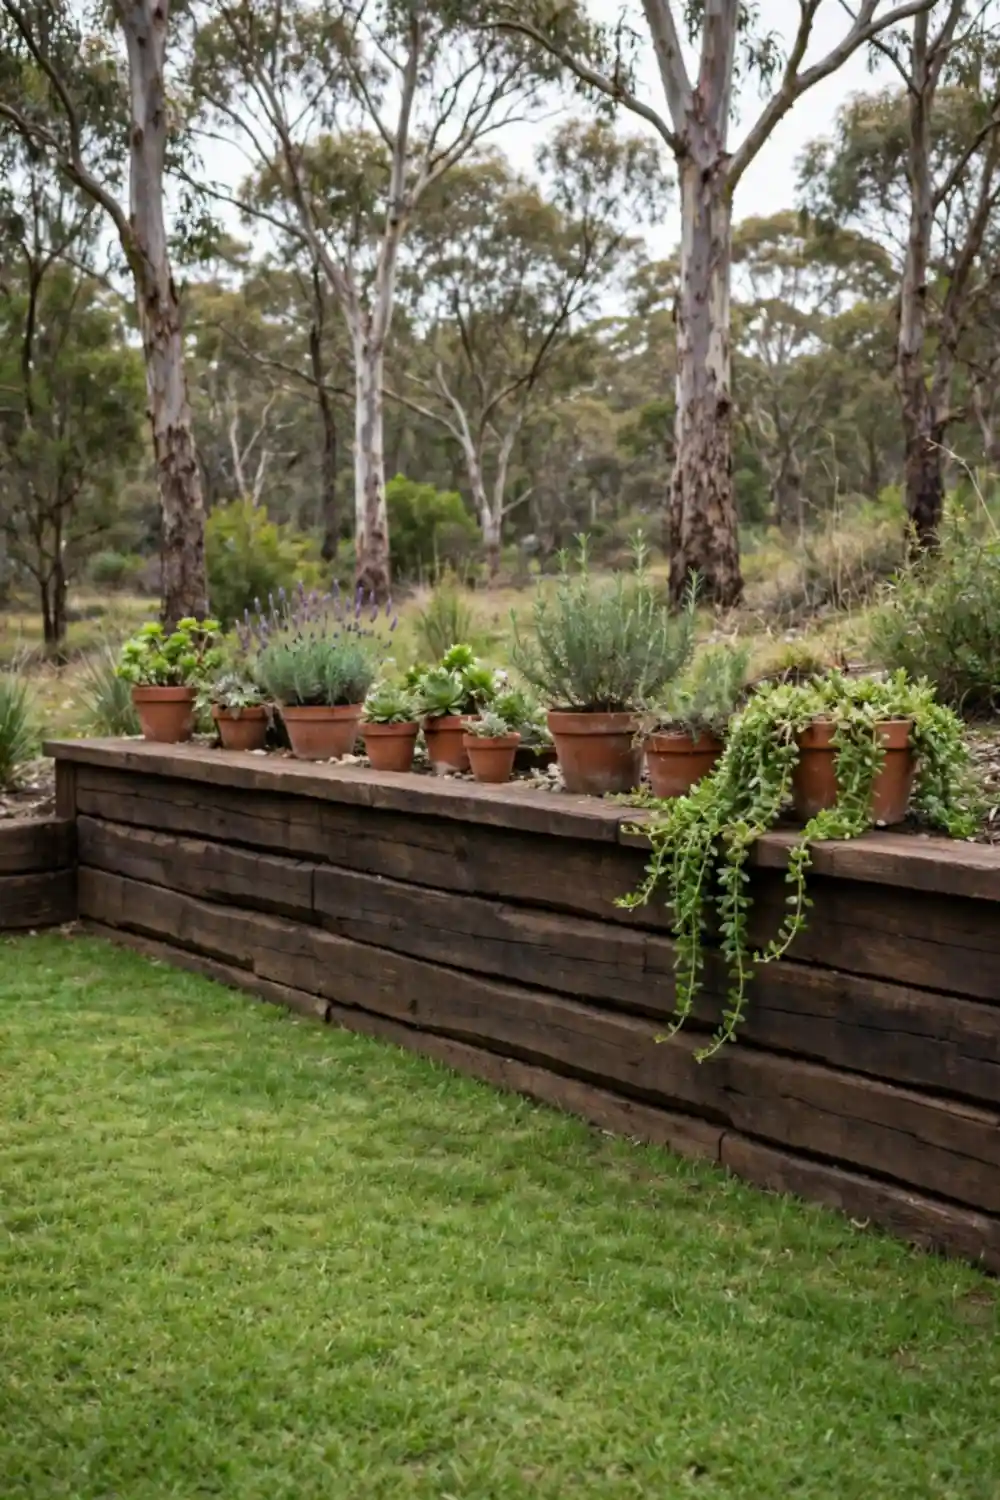
Attach single sleepers face down on top of the wall as a cap, which looks good and doubles as seating. Then stain or paint the timber. After that, inspect the wall after heavy rain, check the drainage is clear, re-treat cut or exposed timber every few years, and trim plants whose roots could damage the wall.
- Capping and care, single sleepers face down on top of the wall
- Finish, stain or paint once the cap is on
- Inspect, after heavy rain, and check the drainage stays clear
- Maintain, re-treat cut timber every few years and trim damaging roots
Posts, spacing and depth
Posts are the critical part of the wall, and the sources disagree about how far apart they should sit and how deep they should go. This section gives the range honestly, with Timber Queensland’s low-wall tables as the reference.
On spacing, constructor.net.au puts 1.8 m centres as the maximum and prefers 1.2 to 1.5 m for a wall that stays straighter for longer. Inspiring Landscapes allows up to 2.4 m, driven by sleeper lengths and strength, while community forum advice prefers 1,200 mm or even 800 mm apart.
On depth, Bunnings digs the hole the same depth as the height above ground, so a 400 mm wall gets roughly 400 mm-deep holes. Constructor.net.au and Inspiring Landscapes bury about a third of the post, and some contracting teams go to half the height plus 100 mm. Forum advice puts posts 600 mm below the bottom of the wall.
Timber Queensland’s TDS 8 tables tie spacing, member size and embedment depth together for walls up to one metre high. The table below is the reference for a low wall, and the engineered footing depths in TDS 9 are not DIY figures and do not belong here.
| Wall height | Sleeper-post embedment, 1,200–1,500 mm spacing | Round-post embedment, 1,200 mm spacing |
|---|---|---|
| 400 mm | 400 mm | 400 mm |
| 600 mm | 600 mm | 600 mm |
| 800 mm | 600–650 mm | 800 mm |
| 1,000 mm | 600 mm with 200×75 posts at 1,200 mm spacing | 1,000 mm, up to 1,400 mm at 2,400 mm spacing |
At 2,400 mm spacing, a 1,000 mm wall is not permitted for sleeper posts in TDS 8 Table 1. The practical rule is simple, wider spacing needs bigger members and deeper footings, so pick the spacing and the timber together, not separately. The 1,400 mm cell in the table is a TDS 8 round-post embedment at wide spacing, not a TDS 9 engineered footing depth.
Drainage, the part that makes or breaks the wall
Drainage needs to be discussed first, before looking at materials, because it can ultimately make or break the retaining wall. Inadequate drainage can overload the wall or scour the footings, and either failure can bring the wall down.
The Bunnings method lays scoria behind the wall, sets the drainage pipe directly on top, covers it with another layer of scoria, then soil. Constructor.net.au lays a 150 mm layer of free-draining material at the base, sets an agricultural pipe at the base of the wall, and covers it with drainage material. Timber Queensland’s TDS 8 requires drainage behind walls over 400 mm high, with a slotted polyethylene pipe at the base discharging to a suitable outlet and geotextile on the inside face of the wall.
Two debates have no settled answer, so both sides are given here. On the pipe sock, constructor.net.au says skip it, because a sock can clog with sediment and make the pipe useless, and instead surrounds the pipe with at least 200 mm of drainage gravel. RetWall’s specification, found in search snippets, uses a sock for filtration, with a 100 mm perforated pipe falling at least 1 in 100 to the discharge point.
On the fill, Bunnings uses scoria, while Inspiring Landscapes warns that scoria is known within the industry to retain more moisture and break down quicker than aggregate. Inspiring Landscapes fills 20 mm aggregate behind the wall to at least half the height of the wall. RetWall’s specification, found in search snippets, calls for a 200 to 300 mm zone of clean 20 mm aggregate with no fines, not crusher dust and not road base.
Where the surface of the backfill drains toward the wall, TDS 9 calls for a surface drain such as a half-round pipe. The RetWall specification, found in search snippets, also includes weep holes of 50 to 75 mm PVC at 1.5 to 3.0 m centres.
Constructor.net.au offers an optional upgrade for wetter sites, a drainage cell pinned to the back of the wall with 65 mm roofing nails, plus a sheet drain. It is an upgrade, not a requirement, and the pipe and aggregate do the main job.
What it costs
All figures here are installed rates from hipages’ 2026 cost guide, and they are indicative only, varying locally and with market forces. No source fetched gives a DIY materials-only total for a standard wall, so none is given here.
Treated pine is the cheapest material in the hipages table, at $250 to $350 per square metre installed. Hardwood sleepers sit at $300 to $450 per square metre in the body of the same guide, although its FAQ section says $550 to $700, so the two figures on one page disagree.
| Item | hipages 2026, installed |
|---|---|
| Treated pine | $250–$350 per m² |
| Hardwood sleepers | $300–$450 per m² |
| Drainage materials | $10–$20 per m² |
| Steel supports | $30–$50 each |
| Concrete footings | $150–$200 per m³ |
Overall, hipages says a small retaining wall could cost under $1,000 while larger ones can escalate to as much as $10,000. Professional installation typically takes at least two to three days.
For the wider picture on garden spending, our guide to how much landscaping costs sets out what a full garden project runs to. Remember that per-square-metre and per-lineal-metre rates are different bases, so never convert one into the other.
Lifespans disagree as much as prices do, so no single figure is given here. Hipages puts H5 treated pine sleepers at up to 20 years and treated hardwood sleepers at 7 to 10 years, while noting that a treated pine wall may need replacing in as soon as 15 years.
Timber Queensland’s TDS 9 gives H5 CCA treated softwood rounds an expected service life of 50 years or more, and durability class 1 hardwoods more than 25 years. Yellow Pages’ 2026 guide, found in search snippets, puts hardwood at up to 35 years.
Frequently asked questions
How much is a wood retaining wall?
Hipages says a small retaining wall could cost under $1,000, while larger ones can escalate to as much as $10,000. The figures are indicative only and vary locally.
How much does a treated pine retaining wall cost?
Hipages puts treated pine at $250 to $350 per square metre, installed. That is the lowest per-square-metre figure in its table.
How much do retaining walls cost Australia?
On hipages’ 2026 figures, treated pine runs $250 to $350 per square metre installed, and hardwood sleepers run $300 to $450 per square metre. Drainage materials add $10 to $20 per square metre, steel supports $30 to $50 each, and concrete footings $150 to $200 per cubic metre. All prices are indicative and vary locally.
What is the most cost-effective retaining wall?
On hipages’ per-square-metre figures, treated pine comes out cheapest, at $250 to $350 per square metre installed, ahead of hardwood sleepers at $300 to $450 per square metre in the body of the same guide. The guide’s FAQ section gives a higher hardwood figure of $550 to $700, which only widens the gap.
The bottom line
A low timber retaining wall is a genuinely DIY-friendly job, provided the wall stays under one metre high, clear of buildings and surcharge loads, and properly drained. The posts do the real work, so spacing, depth and concrete matter more than the sleepers themselves. And the drainage matters more than all of it, because water is what pushes a wall over.
Check your council first, lodge a Before You Dig enquiry, buy H4 timber or better, and give the wall the drainage it needs. A low sleeper wall pairs well with other timber projects in the yard, including building a pergola, and a capped wall doubles as seating once it is done.


