The Christmas tree gets all the attention, and the fence and the verandah sit bare. A string of shop-bought lights can fix that, but the ones that look right cost more than the rest of the decorations put together.
Bought decorations rarely fit the space either. They arrive in a fixed length, in a colour you did not quite choose, and they end up draped wherever the power point happens to be.
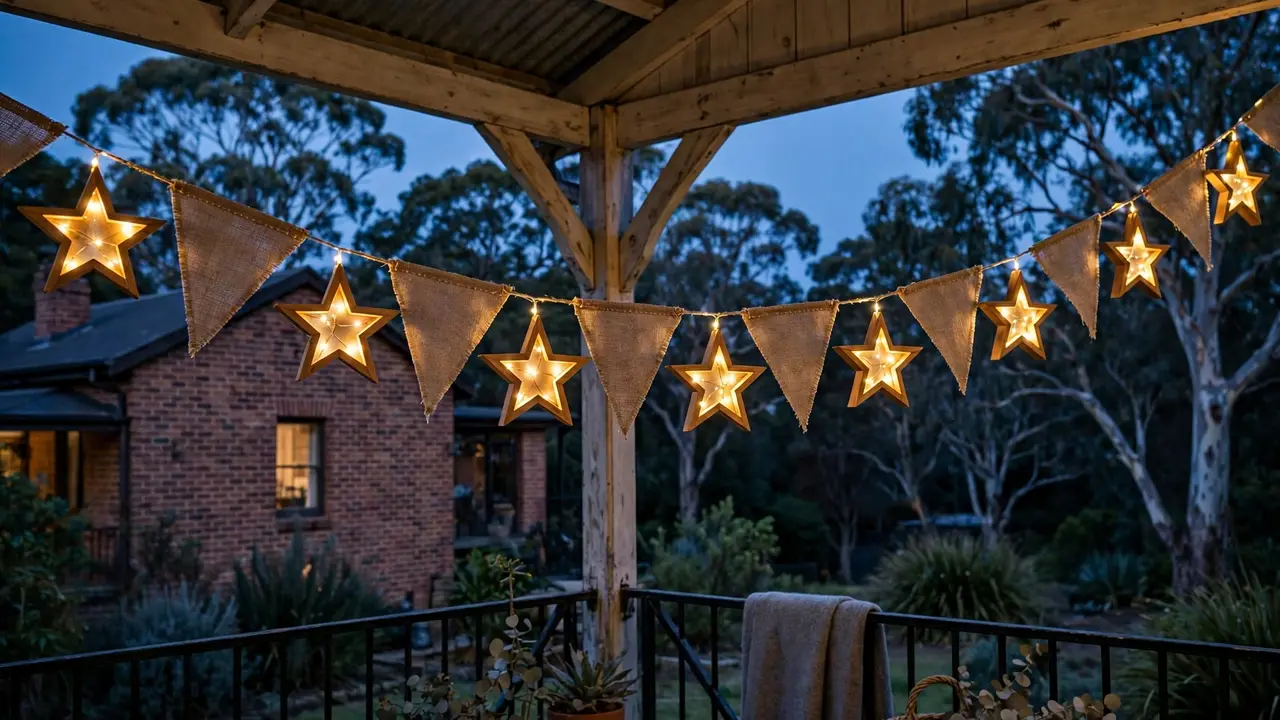
DIY Christmas bunting lights change that. One afternoon, a few supplies from Bunnings and Kmart, and you have a string of hessian flags and lit timber stars made to fit your fence, your verandah or your pergola.
This guide walks through the build in seven steps — flags, stars, lights, hang. It combines two Bunnings methods, the timber star and the hessian bunting, into one project, and every price in it comes from Kmart’s November 2026 catalogue.
What star bunting lights are
Star bunting lights are a single string carrying hessian flags and lit timber stars, hung along a fence, a verandah or a pergola. The project combines two Bunnings methods — the timber star, wrapped in fairy lights, and the hessian bunting, stencilled with festive words — into one decoration made to fit your space. Each star glows from within and the flags carry the message, and the string runs on solar, battery or plug-in power, whichever suits the spot.
DIY Christmas bunting lights: the budget build
The build has three parts — flags, stars and lights — and each one is simple on its own. Make the flags first, then the stars, then join them on one string and hang it. Nothing here needs a workshop, and the tool list is short.
What you need
Gather the supplies before you start, so the build runs in one session. The timber and fabric come from Bunnings, and the lights from Kmart’s November 2026 catalogue.
- Balsa wood or dowels — five lengths per star
- Twine and super glue — to bind the star joins
- Hessian — for the flags; burlap works the same way
- Gold or copper spray paint — for stencilling the words
- Kitchen string — the line the flags and stars hang from
- Hooks — gutter hooks for the house edge, fence hooks for the fence
- Hot glue gun — for craft-stick stars, with eye protection and a mask
- 150 LED low-voltage fairy-light strand, $16 — plug-in through a transformer, from Kmart’s November 2026 catalogue; multi-coloured or warm white
- Solar fairy-light strand — from Bunnings, for the solar version; no price quoted here
The tools are a handsaw, scissors and a tape measure. Add eye protection and a mask for spray painting and hot-glue work, and keep the work area ventilated.
Step 1. Cut the bunting flags
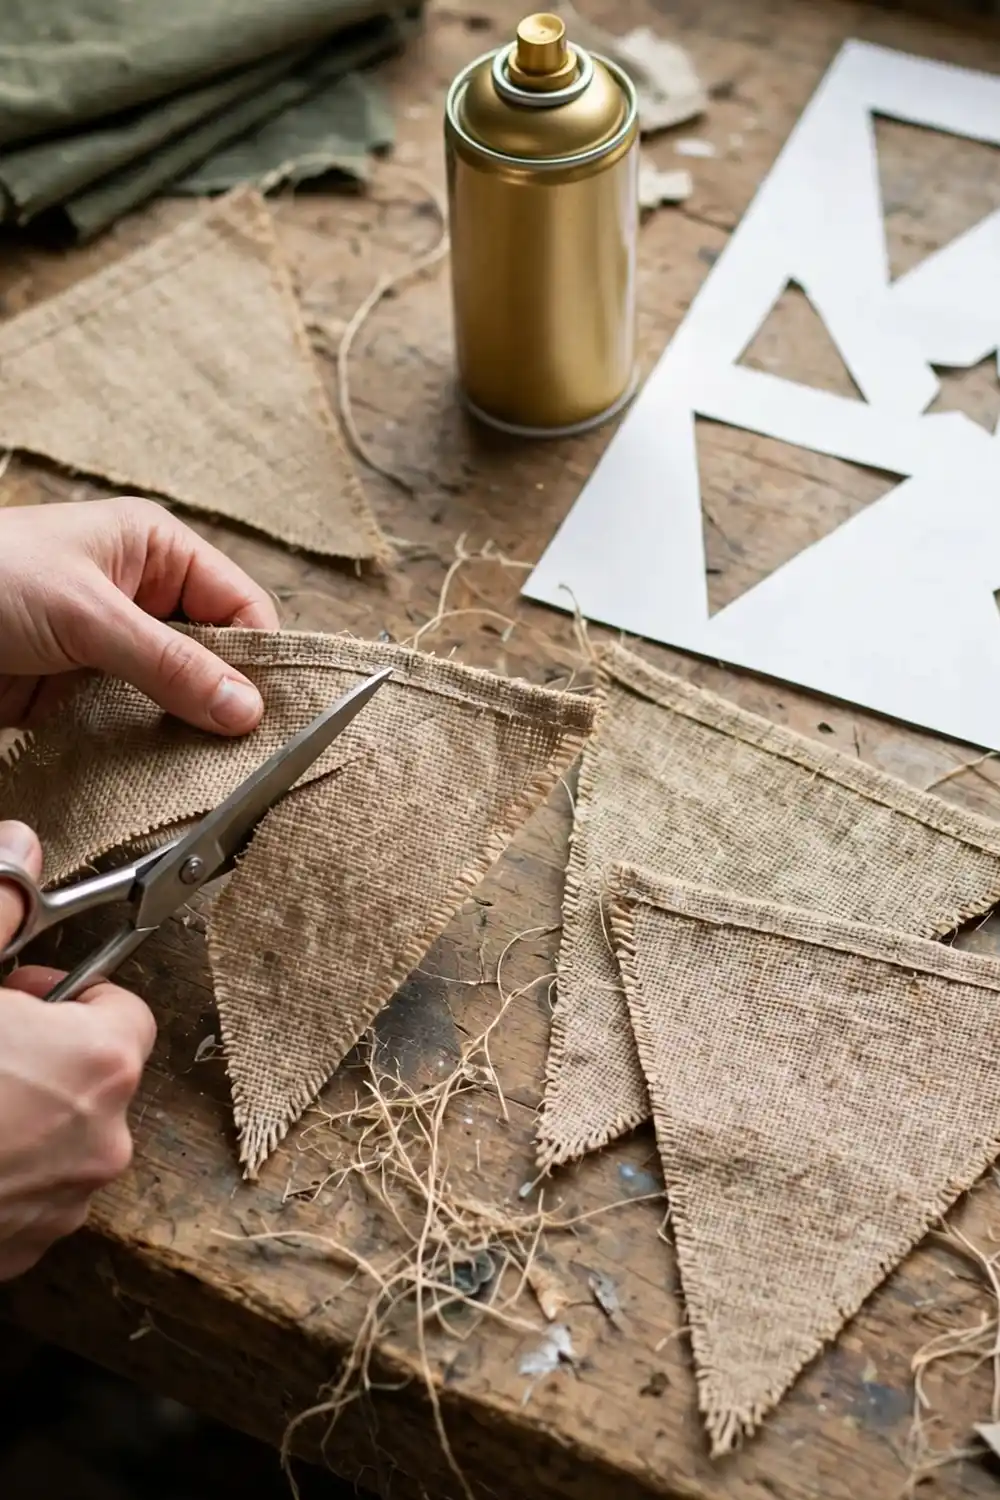
Start with the hessian. Lay it flat on a workbench or table, smooth out the creases, and cut it into flags in whatever shape you like — triangles are the classic choice, but rectangles and swallowtails work just as well. Cut to the shapes you want rather than a fixed size, and space the flags with roughly even gaps, adjusted to the length of your run.
A short fence needs tighter spacing than a long verandah rail, so lay the cut flags along the string on the ground first. That dry run shows whether you have enough flags before anything is knotted on.
- Fabric — hessian, or burlap if that is what your store stocks
- Cut — triangles, rectangles or swallowtails, in your chosen shapes
- Edges — leave them raw for a rustic look, or fold and glue them if they fray
- Count — cut a few spare flags, so one torn flag does not stall the project
Step 2. Stencil the flags
Lay a flag flat and stencil a word on it. Cut the letters from the middle of a sheet of paper, lay the paper over the fabric, and spray paint over it in gold or copper. ‘Joy’, ‘peace’ and ‘noël’ are the words Bunnings suggests — one word per flag reads best from a distance.
Let each flag dry fully before you touch it. Spray paint on hessian needs time, and a damp flag will smudge the moment it is folded or strung. Work outdoors or in a well-ventilated spot, and wear eye protection and a mask while you spray.
- Best for letters — gold or copper spray paint on natural hessian
- Best for words — ‘joy’, ‘peace’ or ‘noël’, one word per flag
- Watch out — wet paint smudges, so let each flag dry fully before stringing
- Watch out — spray outdoors or in a ventilated spot, with eye protection and a mask
Step 3. Make the timber stars
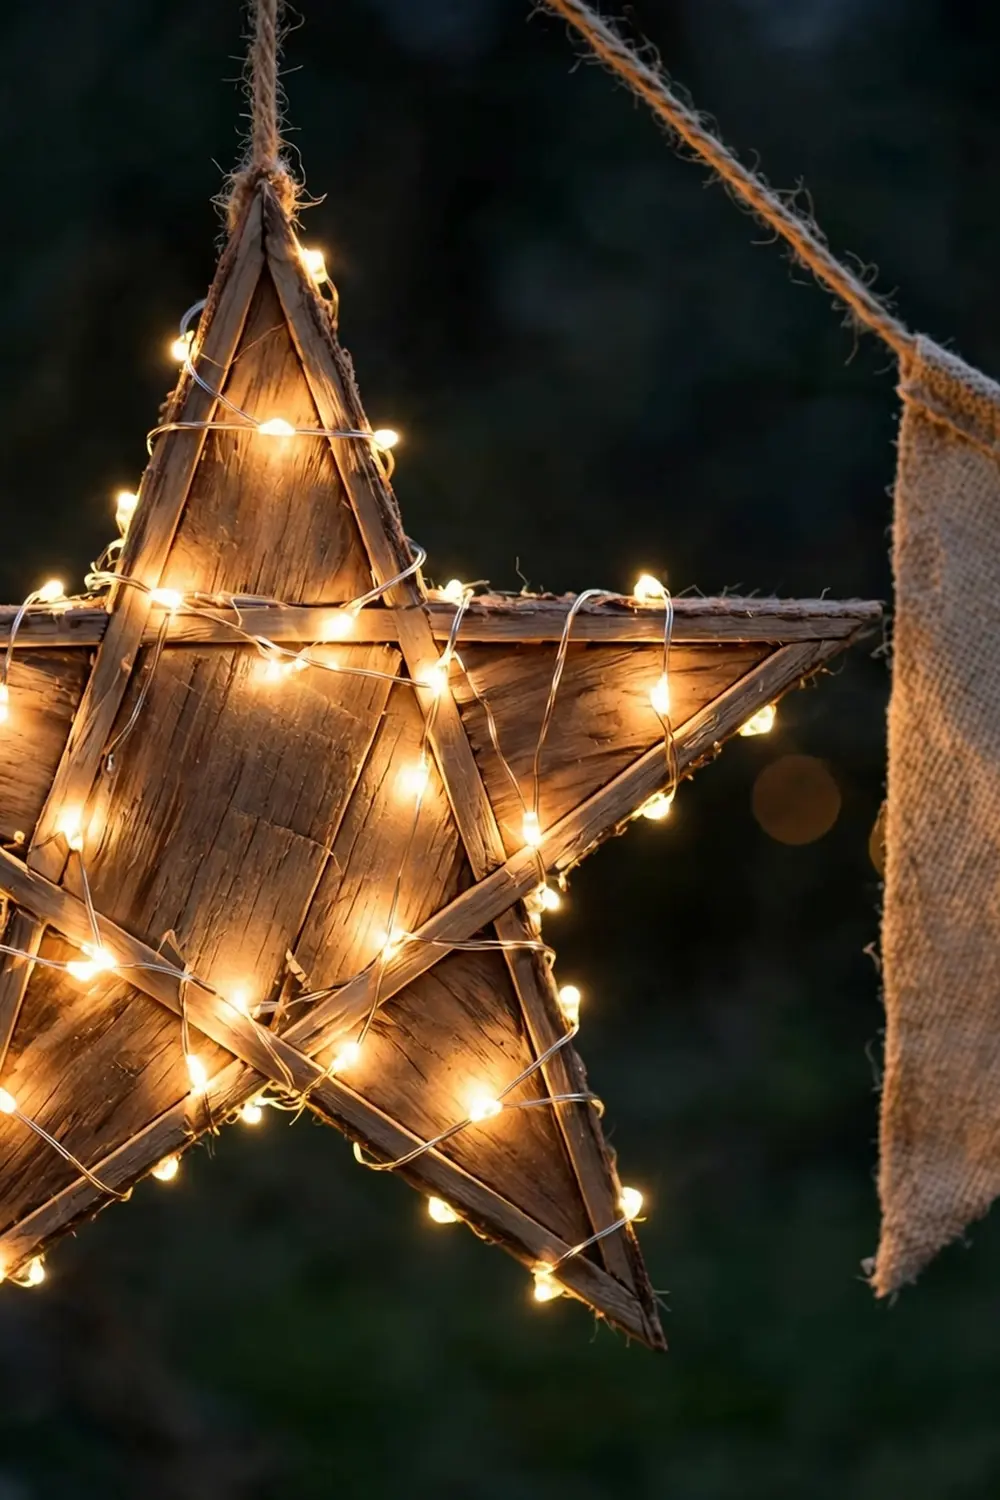
Cut the dowel or balsa wood into lengths with a handsaw — five pieces make one star. Arrange them on a flat surface, layering them into a five-pointed star, and wrap twine over each point where the wood meets, securing it with super glue and leaving it to dry. Straight sticks from the garden can stand in for dowel if you have them.
Keep each star close to the width of a flag — a star much wider will pull the string out of shape. Make as many stars as you have gaps between flags, plus one spare.
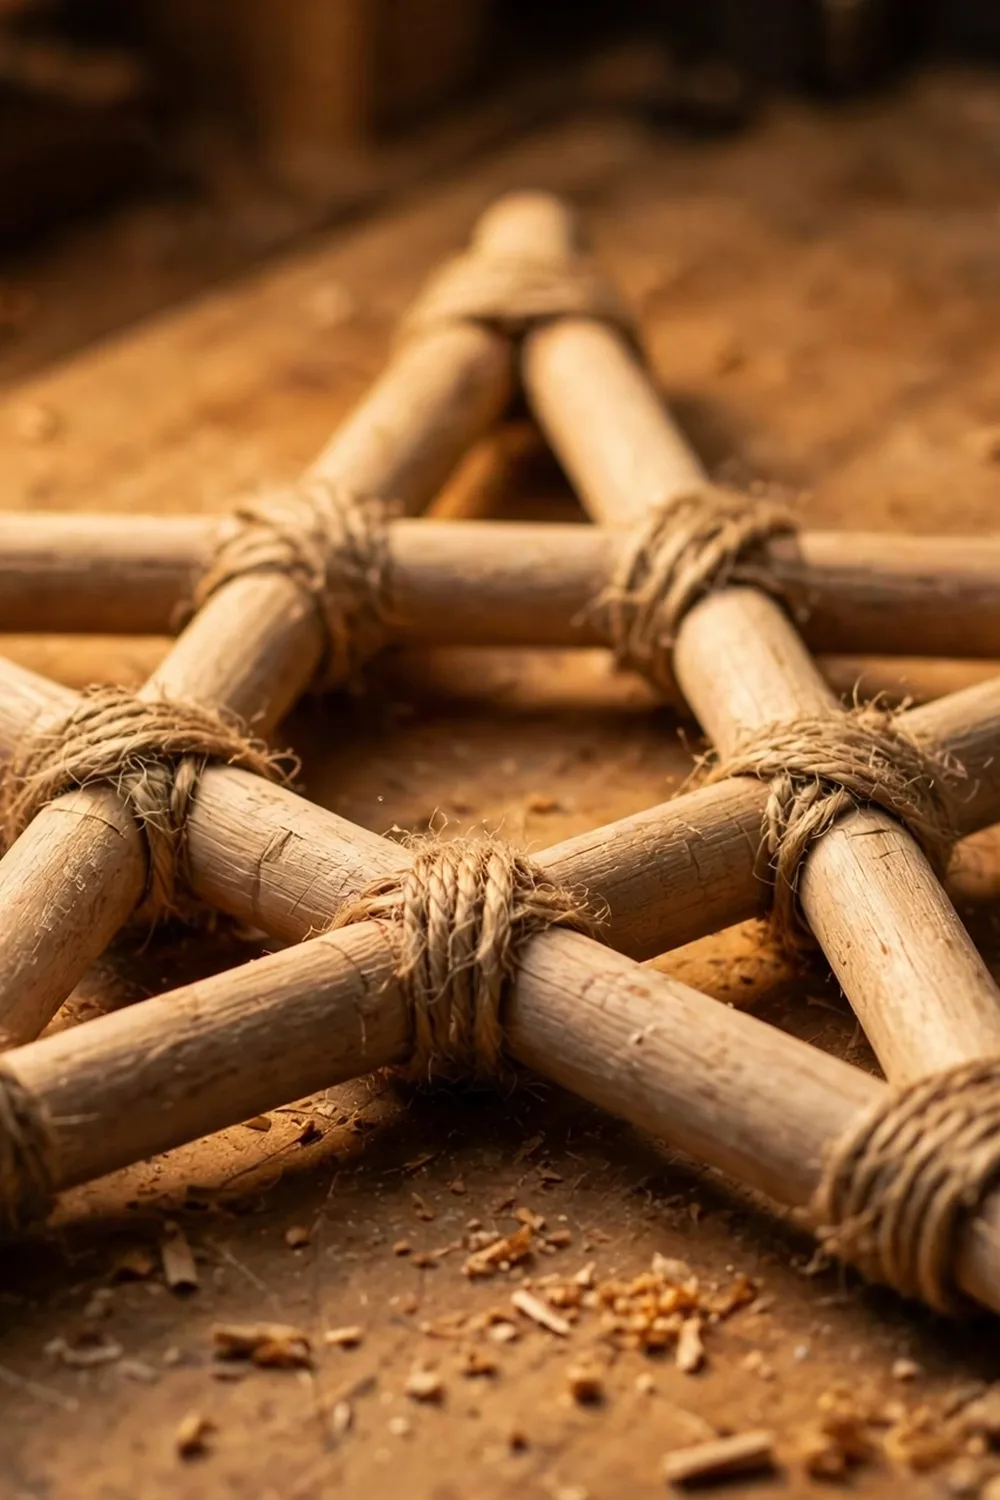
- Wood — dowel or balsa, five lengths per star; straight garden sticks can substitute
- Joins — twine wrapped over each meeting point, fixed with super glue, left to dry
- Size — about the width of a flag, so the string hangs evenly
- Second way — craft sticks and a hot glue gun, wrapped in kitchen string, for smaller stars
Step 4. Wrap the stars with fairy lights
Take a fairy-light strand and wrap it around the star, keeping the lights tight against the wood so every point glows. Leave a short tail of lights trailing from the star — that trailing tail is what gives the shooting-star effect Bunnings describes.
Choose your power first, because the strands are different products. A solar strand charges in daylight and needs no mains power, while Kmart’s 150 LED low-voltage strand, $16 in its November 2026 catalogue, plugs in through a transformer.
Do not mix the two on one star — a solar strand and a plug-in strand have different leads and power, and joining them will not work. Pick one type for the whole string so every star behaves the same way at dusk.
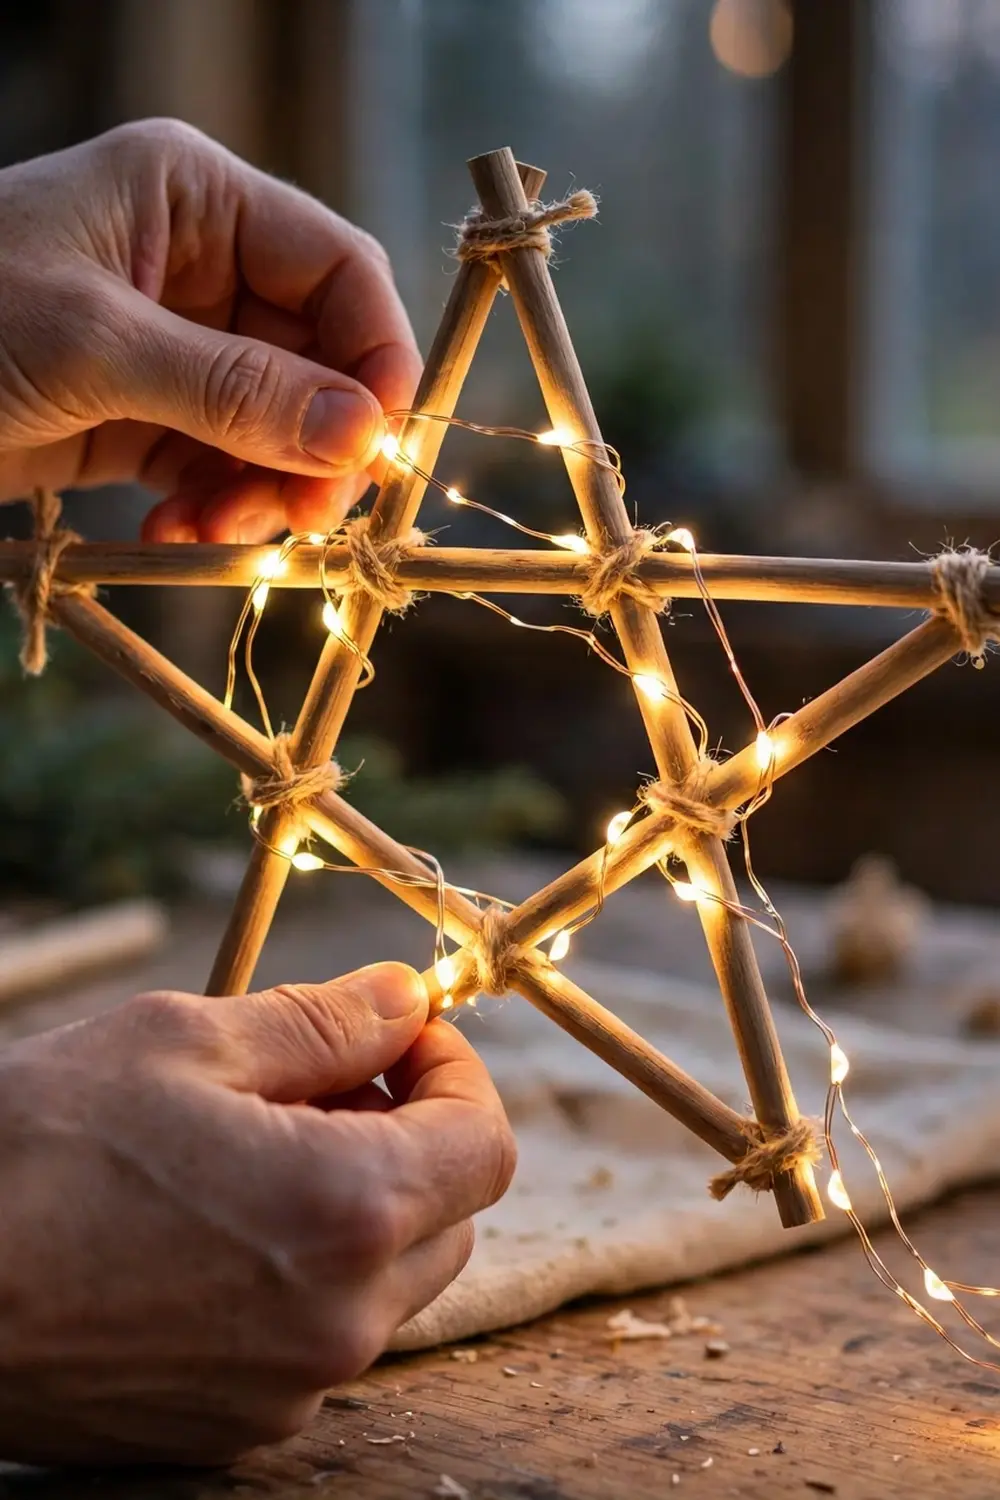
- Solar — a solar fairy-light strand; the panel charges in daylight, no mains power needed
- Plug-in — Kmart’s 150 LED low-voltage strand, $16 (November 2026 catalogue); plugs in through a transformer
- Wrap — lights tight against the wood, covering every part of the frame
- Tail — a short trail of lights left hanging from each star for the shooting effect
Step 5. String it together
Lay the kitchen string out on the ground and knot the flags and stars onto it. Alternate a flag and a star along the string, so the lights break up the fabric and the message reads between the stars. Space them with roughly even gaps, adjusted to the length of your run — a short fence needs tighter spacing than a long verandah rail.
Tie each piece on with a firm knot and tug it once to check it. A slipped star drags the string down, and re-tying on the ground beats re-tying on a ladder.
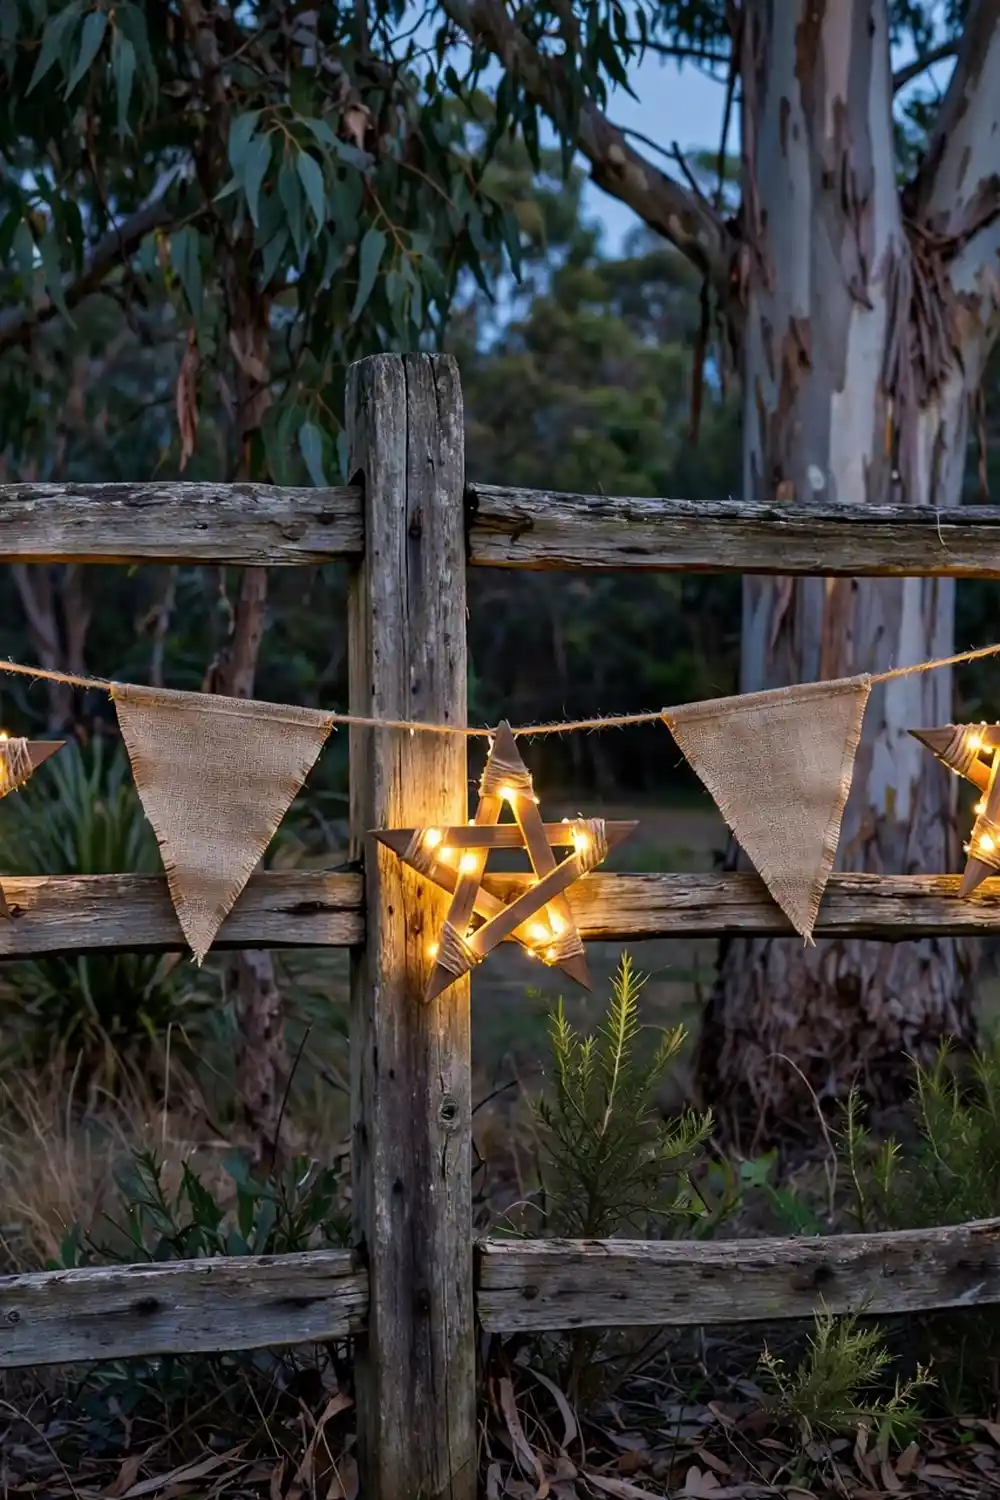
- Order — flag, star, flag, star, so the lights break up the fabric
- Gaps — roughly even, adjusted to the length of your run
- Knots — firm, and tug each one once before you hang the string
- Spare — keep one flag and one star aside in case a piece tears
Step 6. Hang it safely outdoors
Plan where the string will go and where its power comes from before you hang anything. Map out the hooks, check the lights work, and only then climb the ladder. Gutter hooks clip onto the house perimeter without tools and can be reused each year, while fence hooks suit a garden fence.
Set the ladder on stable, level ground, keep three points of contact, and move the ladder instead of overreaching — never stand on the top rung, and have someone hold it if you can. If the lights plug in, protect the connection from water and debris with an outdoor safety box, kept stable and away from puddles.
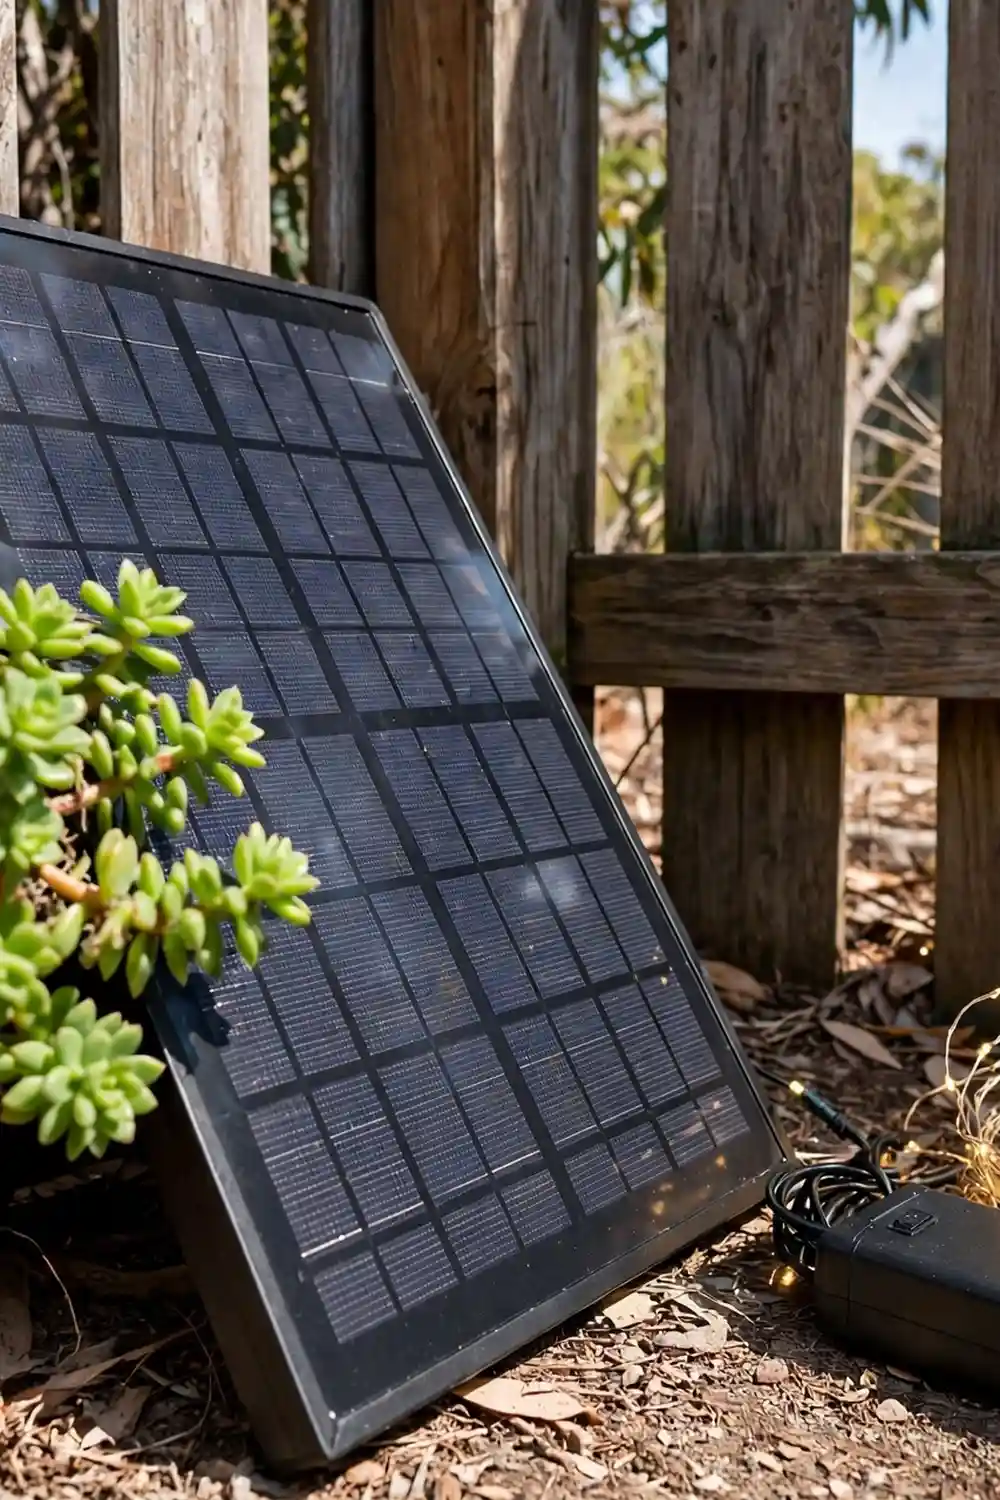
- Power first — know where the strand plugs in, or where the solar panel will sit, before hanging
- Hooks — gutter hooks for the house edge, fence hooks for the fence
- Ladder — stable level ground, three points of contact, never the top rung
- Connections — plug-in lights go through an outdoor safety box, away from water
Step 7. Test it and set the timer
Switch the lights on before dark and walk the length of the string. Look for a dark star, a crooked flag or a sagging section — each one is a quick fix now and a ladder job later. If you used a solar strand, check the panel sits where it catches daylight, and hide it behind a planter if it shows.
Set a timer or a smart plug so the lights come on at dusk and off at bedtime. Check the plug suits the lights and the spot, and that it works with the brand you bought — smart gear from different brands does not always work together.
- If a star is dark — check the strand’s connection before you blame the lights
- If a section sags — re-tie the knot or move a hook, rather than pulling the string tighter
- If the panel is shaded — move it into daylight; a solar strand only charges in sun
- Timer — a smart plug or timer switch, checked for compatibility with your lights
Where to hang it
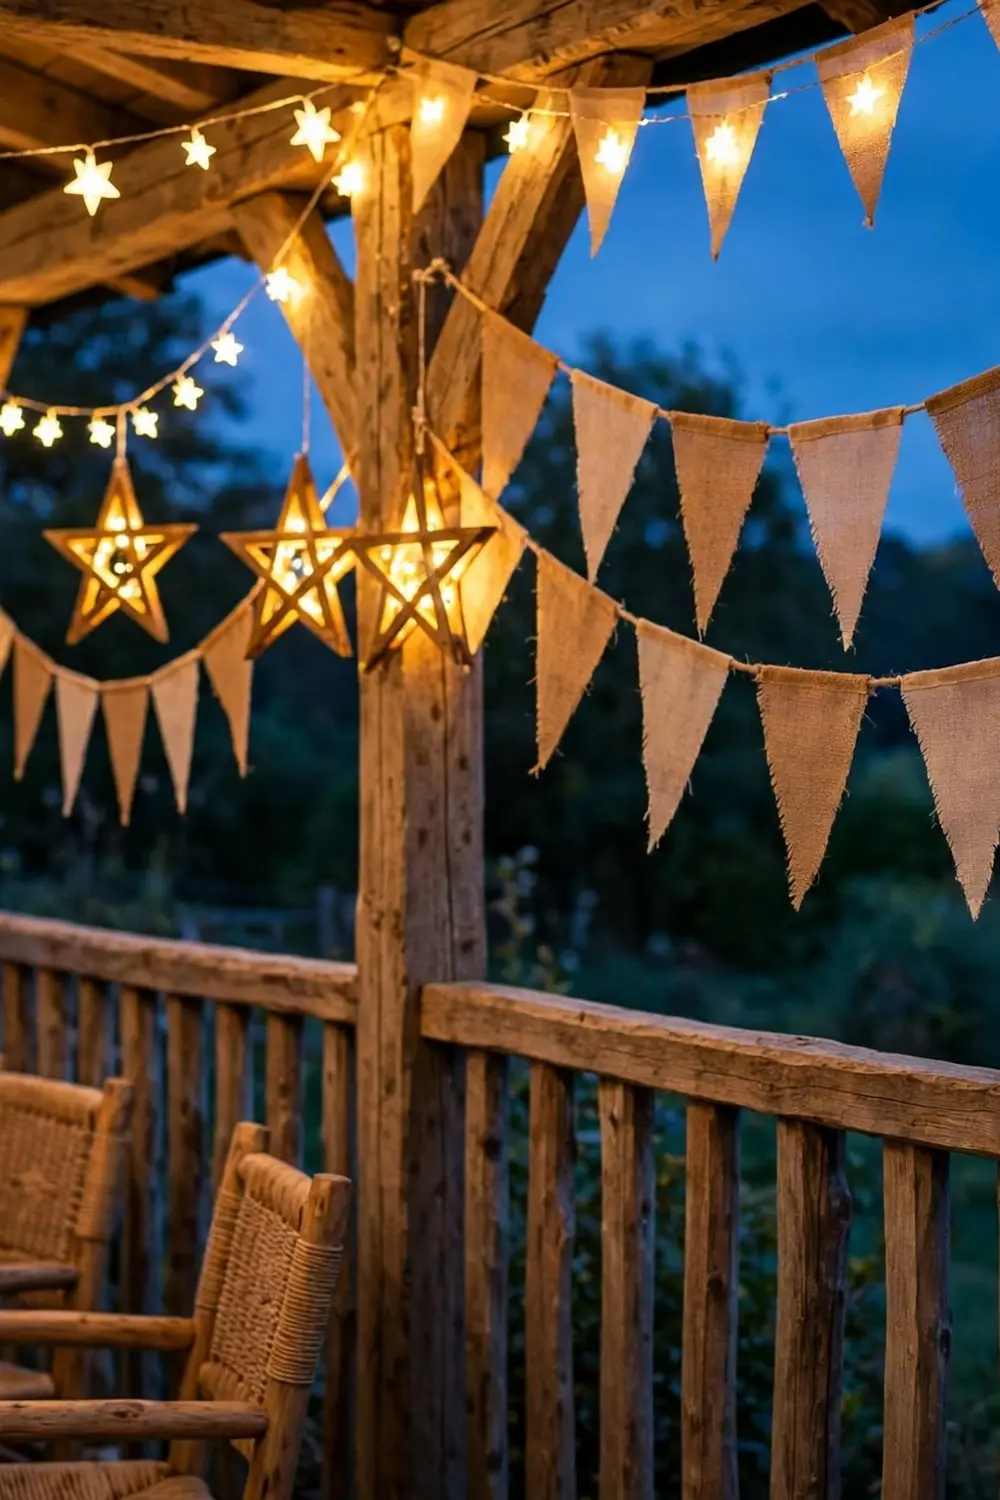
A fence is the natural home for star bunting — the string runs its length and the stars show from the street. A verandah or pergola works just as well, and the roof shades the bunting through the heat of the day. Indoors, hang it near a window so a solar panel can still charge.
The same string also works looped around the Christmas tree, with the stars tucked between the branches. If the tree is where your bunting will live, our guide to choosing and decorating a Christmas tree covers the setup.
Solar, battery or plug-in — which power suits your spot
The power choice decides where the bunting can go. Solar needs daylight on the panel, battery needs a pack you can reach, and plug-in needs a power point and a safety box. The prices below are from Kmart’s November 2026 catalogue, each one for the product named — the solar stakes and battery decorations are separate products, not light strands.
| Power | What it costs (Kmart, Nov 2026 catalogue) | Where it suits | What to watch |
|---|---|---|---|
| Solar | 4-pack solar LED star stakes, $16 | Garden beds and fences where the panel gets sun | The panel needs daylight; a shaded panel will not charge |
| Battery | Star tree topper $6, wire star topper $12, star floor lantern $36 | Small battery-powered stars and displays with no power point nearby | Keep the battery pack accessible and follow the maker’s placement instructions |
| Plug-in | 150 LED low-voltage fairy-light strand, $16 | Verandahs and walls near a power point | Plug-in connections outdoors need an outdoor safety box |
What to avoid
- Indoor-only lights outdoors — check the product instructions and use lights only where they are designed to go. Indoor and outdoor setups expose lights and connections to different conditions.
- No power plan — deciding where the power comes from after the string is up means re-hanging it. Plan the layout and the power source first.
- Overreaching on the ladder — move the ladder instead of stretching for the next hook, and never stand on the top rung.
- Mixing smart brands — lights and smart plugs from different brands do not always work together. Check compatibility before you connect them.
Frequently asked questions
Can I use any Christmas lights outdoors?
No. Check the product instructions before you install them, and use lights only in the locations they are designed for. Indoor and outdoor setups expose lights and connections to different conditions, so do not assume a set made for one place suits the other.
What should I check before hanging Christmas lights?
Plan where the lights will go, work out where their power comes from, and check that the lights work before you install them. If you are using connected or smart products, check they are compatible before you set the display up.
What can I use if there isn’t an outdoor power point nearby?
Battery-operated or solar-powered lights are useful alternatives where convenient mains power is not available. Choose an option suited to the location and follow the product instructions for it.
The bottom line
DIY Christmas bunting lights are a one-afternoon project with a big payoff — hessian flags, timber stars and fairy lights on a single string, made to fit your fence or verandah. Build it in early December, hang it safely, and it will carry the festive season, with the stars good to leave up all year.
If this project has you in a making mood, the DIY bobble lamp and mirror is another afternoon build that turns something plain into a feature piece.